• About Me
  • Products
  • Recipes
    • Breakfast
    • Drinks
    • Salads
    • Soups
    • Vegetables
  • Places
    • Restaurants
  • People
    • Potters
  • Books

A Good Dish

making food simpler

What to Cook in Spring When Local Still Means Root Vegetables

April 11, 2018

Golden beets with dill vinaigrette
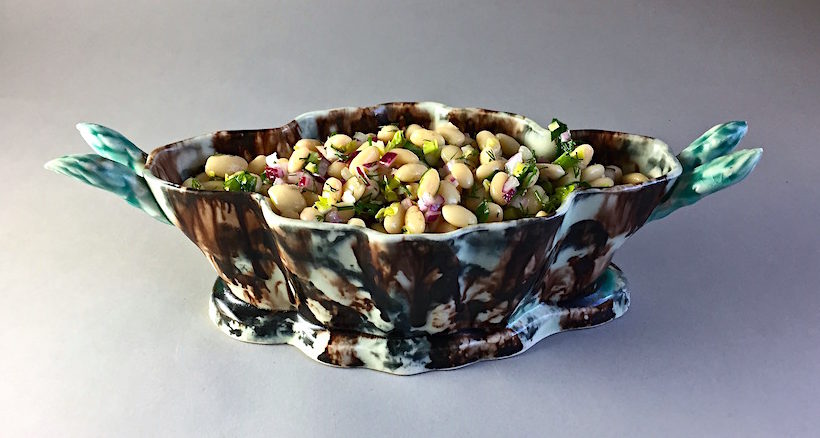
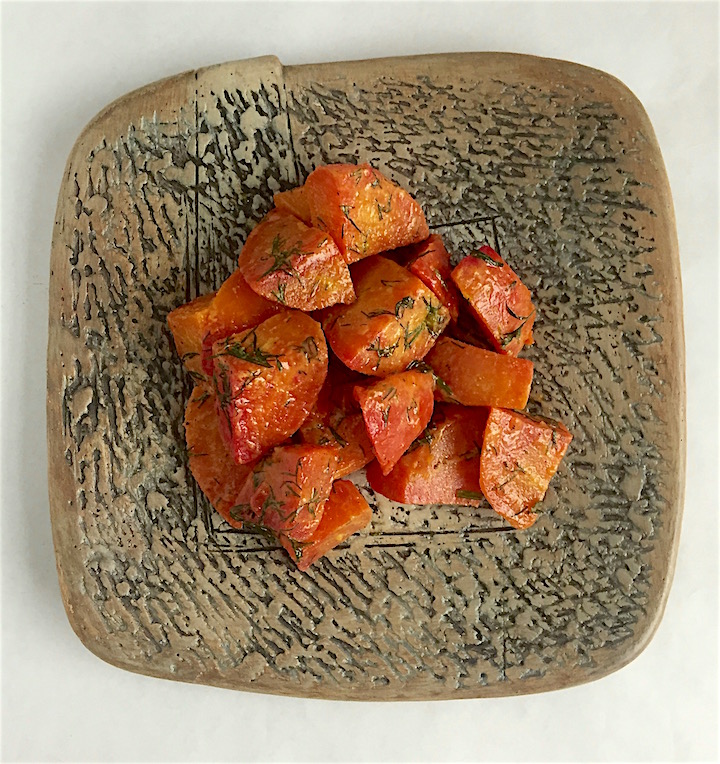
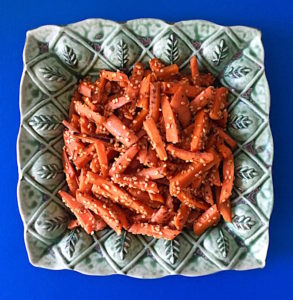
Plate by Mary Barringer

Local asparagus is coming. So are ramps, fiddleheads and green garlic. But until they get here, we still need vegetables to eat. I am cleaning out my fridge and freezer this spring, trying to use up the jarred, frozen and preserved fruits and vegetables I stocked it with last fall. And then there are the roots.

Carrots (and beets) are available in several colors

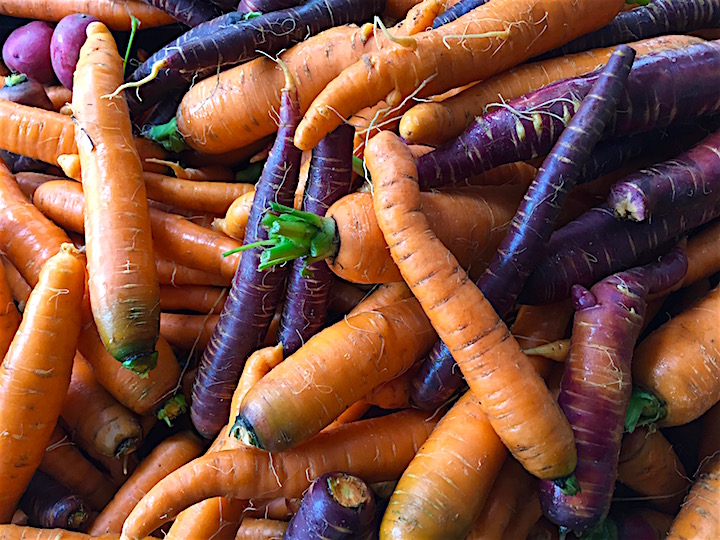
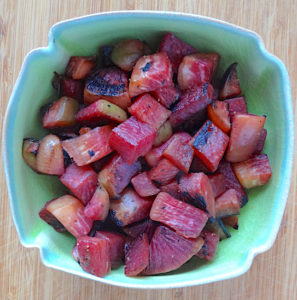
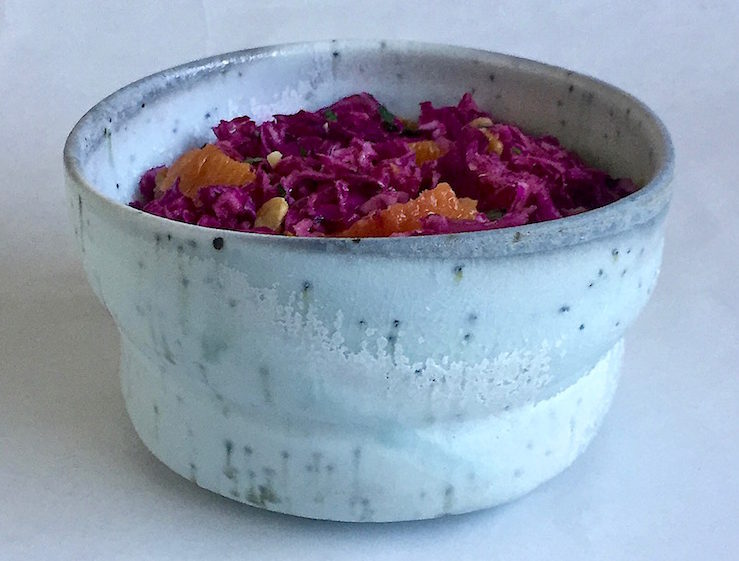
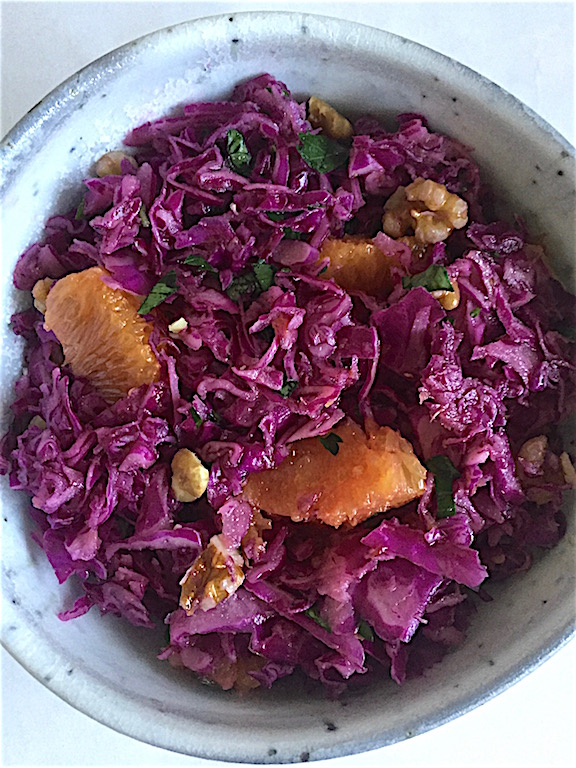
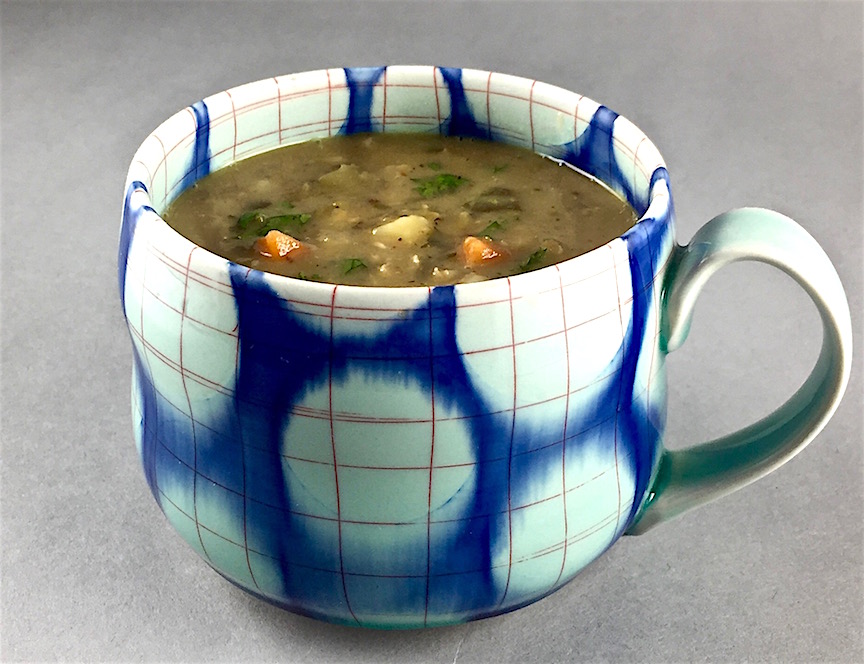
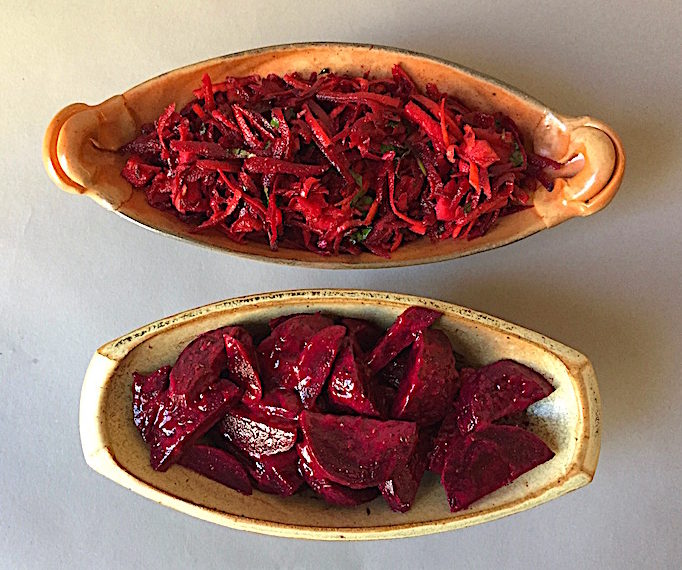
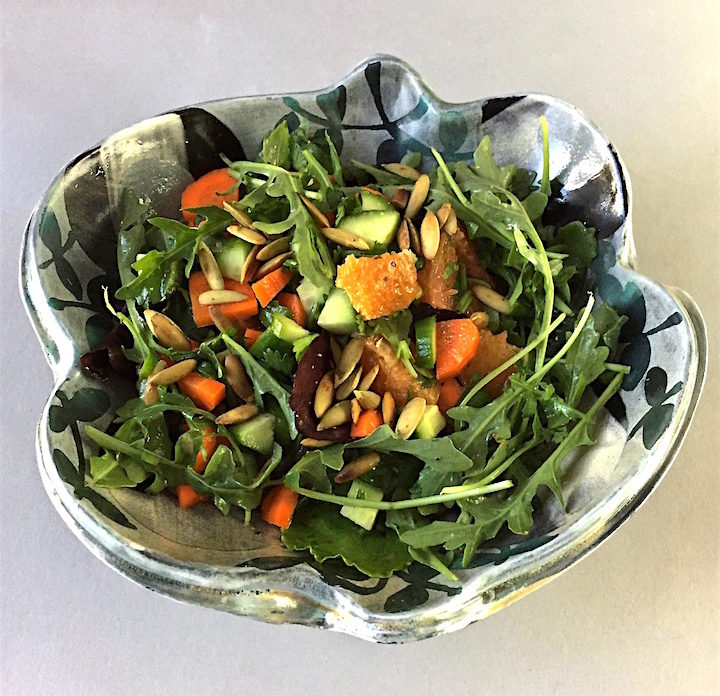
Beets, watermelon radishes, carrots, parsnips, rutabagas and celery root are still available at our local markets as are potatoes and sweet potatoes. While the weather is still cool enough, and before the local greens arrive, I will continue to roast, steam, mash and sauté them, as suitable, and add them to soups. Root vegetables are quite nutritious, if grown in good soil, and usually quite inexpensive. If you browse social media, shots of root vegetable roasts seem to be trending. Perhaps roots are the new kale. Don’t forget horseradish is a root, is available right now and preparing it couldn’t be much easier (see recipe). Remember that roots also make wonderful salads which even improve after sitting in the refrigerator overnight.

Horseradish roots

I have linked below to several past posts that included root recipes. I keep linking to them in the hope that they will help you use up the contents of your crisper or give you some inspiration when you go to the market. Local greens will be here soon. But until then, don’t forget your roots!


Plate by Margaret Bohls

Cooked Carrots


Oval bowl by Emily Schroeder Willis

Carrot Salad


(top) – oval bowl by Robbie Lobell
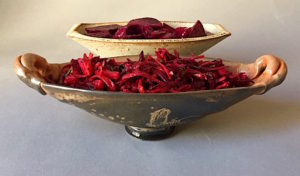
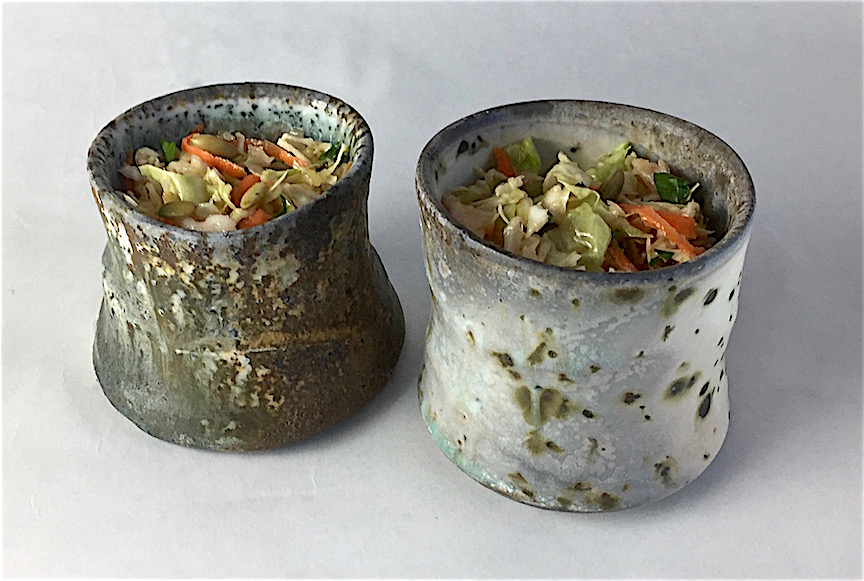
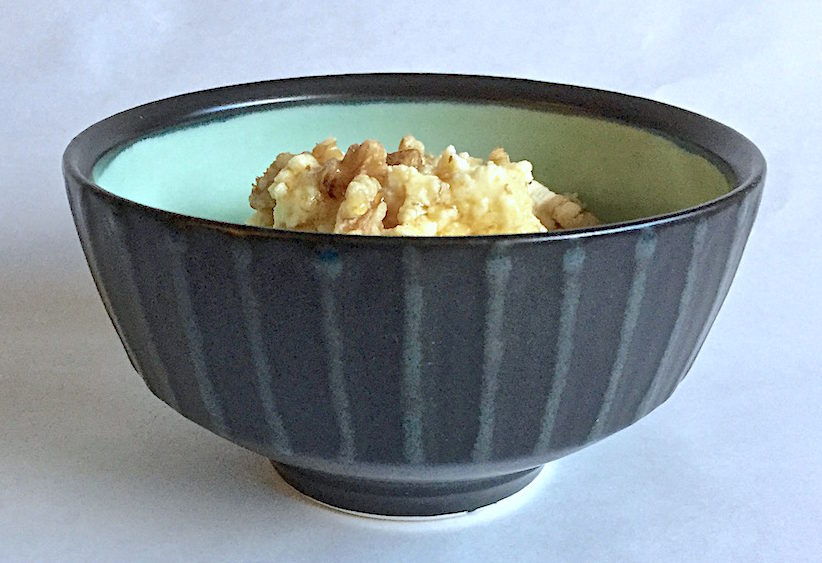
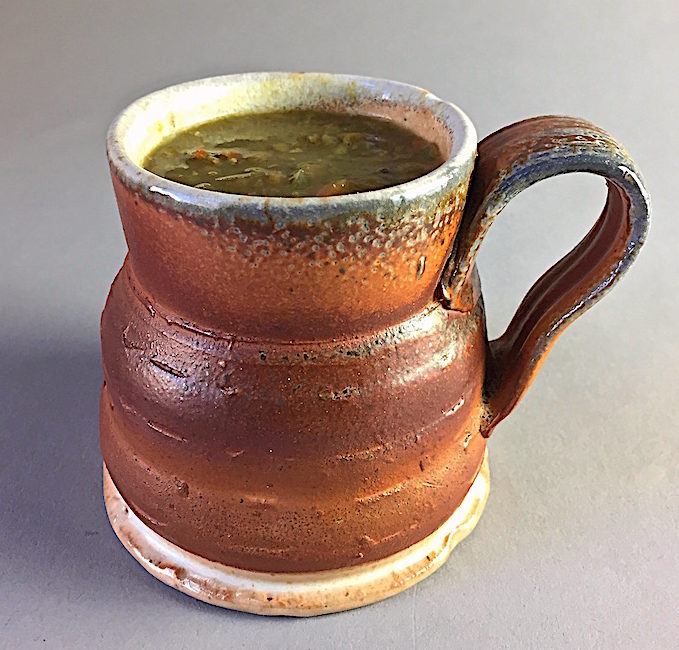
(below) – Shino glazed bowl by Malcolm Davis

Beet Salad Two Ways


Glazed Porcelain Dish by Andrew Martin

Roasted Parsnips


Squared Bowl by Silvie Granatelli

Sautéed Watermelon Radish

Share this:

  • Click to email a link to a friend (Opens in new window)
  • Click to share on Facebook (Opens in new window)
  • Click to print (Opens in new window)
  • Click to share on Pinterest (Opens in new window)

Filed Under: Recipes, Salads, sauces and dressings, Vegetables Tagged With: root vegetables, spring vegetables

Don’t Hold Your Nose! Cabbage Can Be Your Go To For An Early Spring Salad

March 28, 2018

Purple Cabbage Salad with Umeboshi Dressing
Wood Fired Bowl by Perry Haas

Cabbage may not be the first thing you think of when planning a meal but it is your friend when it comes to making a winter salad. Especially at this time of year, when you are tired of shredded beets or carrots or kale but you still want some crunch, reach for cabbage instead. Cabbages last remarkably well in cold storage through the winter, providing vitamins C and K and a good amount of fiber when other green (or purple vegetables) are wilted and well past use.

Cabbage is delicious sautéed and fermented but can also make a remarkably fresh salad in these early spring months. Cole Slaw is a typical use but shredded cabbage with a vinaigrette is preferable, in my opinion, since it eliminates the use of mayonnaise. There are wonderful recipes for Indian and Thai cabbage salads with coconut and spices but my perennial favorite is made with orange juice and umeboshi paste, mashed pickled plums found at markets that carry Japanese products.

This salad is the decendant of a recipe I learned in one of the first cooking classes I ever took. It was created by Minx Boren, who taught at the Natural Gourmet Cookery School in it’s early years and is now a life coach in Palm Beach. Natural Gourmet is a cooking school with a chef-training program focused on healthy eating. It is where I learned basic knife skills, a focus on nutritional balance and how to prepare global specialties from tamales to nori rolls to dosas. When learning to cook, I thought umeboshi paste and avocado oil were such exotic ingredients and, at that time, you really did have to search them out. Now even Costco sells avocado oil and Whole Foods and Fairway carry Umeboshi plums. If you really don’t like cabbage or don’t want to use it for some reason, this salad would also be good made with kale (massage it first) or shaved brussel sprouts, fennel or even blanched broccoli, carrots and cauliflower.

I have adjusted the original recipe only slightly in proportions, deleted and added a few ingredients. You can adjust it to suit your tastes. If you don’t want to add parley or cilantro, don’t. If you prefer cucumbers or red peppers to carrots, please use them. If you want to add some toasted sesame seeds instead of pumpkin, go ahead. Combining some purple cabbage with the green, or going all purple, will make the salad even more appealing. One of the beauties of this salad is that it tastes even better the second day, after the flavors have melded in the refrigerator, and it holds up well in a lunch box. If you find your cabbage tasting too strong or a little sharp or wilted after a winter in the fridge, just soak the shredded cabbage in cold water (before dressing) and it will sweeten and plump up.

Green Cabbage Salad with shredded carrots and toasted pumpkin seeds
Whiskey cups by Perry Haas

CABBAGE SALAD with UMEBOSHI DRESSING

Toss together in a large bowl:

  • 1 head cabbage, shredded
  • 2 carrots, shredded
  • 1 cup parsley or cilantro, chopped
  • 1/4 cup toasted pumpkin seeds (add when serving)

     Optional alternatives or add-ins: red or green pepper pieces, sliced red radish, orange segments (cara cara or blood oranges look great), chopped apple, chopped cucumber, toasted sesame seeds, walnuts, thinly sliced celery 

Dressing:

  • 1 TBs minced red onion
  • 2 TBs umeboshi plum paste
  • 2 TBs Dijon mustard
  • 2 TBs avocado oil
  • 1 cup freshly squeezed orange juice

Toss vegetables with dressing and let marinate in the refrigerator at least 2 hours or overnight. Top with seeds before serving.

Purple Cabbage with Cara Cara orange segments, parsley and walnuts

Share this:

  • Click to email a link to a friend (Opens in new window)
  • Click to share on Facebook (Opens in new window)
  • Click to print (Opens in new window)
  • Click to share on Pinterest (Opens in new window)

Filed Under: Recipes, Salads, sauces and dressings, Vegetables Tagged With: cabbage salad

Healthier Cheesecake – No, That Is Not Necessarily An Oxymoron

March 1, 2018

Healthier cheesecake with berries and jam
Porcelain plate by Ryan J. Greenheck

We have a minor dessert dilemma in our home. My husband loves cheesecake. Always has. Especially the tall Italian style you used to find on the lower east side of Manhattan or on Arthur Avenue in the Bronx. But he has become a healthier and more abstemious eater and now eschews most sugar and saturated fat so cheesecake no longer fills the bill. Last spring, when his birthday was approaching, I decided it was time to reckon with these conflicting desires. It took me many tries and although it’s far from perfect, I came up with what is essentially a baked ricotta pudding topped with berries, his favorite. It’s not the fabulous layered ice cream cake on a cookie crust I make for my son’s birthday but, believe me, it tastes better than it sounds.

Baked until golden, this can be served in slices or scooped into bowls as a pudding

Because I decided to forgo a crust, I felt a thick pudding (he loves chocolate pudding) might work if I could get the taste right. This recipe is the result – an amalgam of a custard pie and a cheesecake, and good for dessert or breakfast. I used a combination of Greek yogurt and ricotta cheese with maple syrup replacing sugar. The more eggs you use, the thicker, stiffer and richer the “cheesecake” will be. You could use gelatin or agar to firm up the texture instead of eggs but it would be more like pannacotta. Portion it out, bake and serve the pudding in ramekins or short glass jars, in keeping with the current layered breakfast/dessert in a jar trend, or use a single, larger cake pan or soufflé dish and spoon it out family style. If you want to serve it like cheesecake, sprinkle some graham cracker, digestive biscuit or ginger cookie crumbs to cover the bottom of a greased springform pan,pour in the pudding and bake. It holds its shape when sliced if you treat it gently.

Cheesecake pudding with maple syrup and walnuts
Porcelain bowl by Ryan J. Greenheck

Top this baked “cheesecake” any way you like. Choose any topping from berries, with or without a fruit sauce or blop of jam, to maple syrup with toasted walnuts (delicious). Blend in some cocoa powder, melted chocolate and chocolate chips. Or use slices of cooked citrus, caramelized bananas, fresh kiwi slices or pitted, halved fresh or cooked cherries. It’s your dessert, your choice. I liked it plain but my husband preferred it with fruit spread and berries. It isn’t your usual cheesecake but it is pretty good.

Cheesecake “pudding” with maple syrup and walnuts
Porcelain bowl by Ryan J. Greenheck

HEALTHIER CHEESECAKE/CHEESECAKE PUDDING

Preheat oven to 350 F.

Mix just until smooth (I used a blender):

  • 2 cups plain thick Greek yogurt
  • 2 cups ricotta cheese (15oz container)
  • 2 eggs, beaten
  • 1/4 cup maple syrup (less or more to taste)
  • zest and juice of 1 lemon
  • 1 tsp vanilla extract

Pour into an 8 or 9″ cake pan or soufflé dish and bake one hour until firm and just starting to brown. Cool and serve at room temperature or refrigerate and serve chilled.

Top with berries, fruit compote, jam, caramelized bananas, more maple syrup and nuts, chocolate chips and a sprinkle of cocoa powder or whatever pleases you. Untopped, this will last up to 3 days refrigerated and serves 6.

Share this:

  • Click to email a link to a friend (Opens in new window)
  • Click to share on Facebook (Opens in new window)
  • Click to print (Opens in new window)
  • Click to share on Pinterest (Opens in new window)

Filed Under: Breakfast, dessert, Recipes

10 Easy Recipes From A Good Dish in 2017 to Make in 2018 – Happy New Year!

January 2, 2018

Thanks for all of your supportive feedback throughout the year. I enjoy writing this blog and so appreciate that you read it. In case you missed some of the posts, here is a reminder of 10 easy recipes from the past year that can be made with ingredients available right now. Included are links to soups, salads, vegetables and a couple of sweets that you told me you enjoyed as well as to the artists whose pots are used in the photos. I hope you will try the recipes (if you haven’t already), keep reading and responding to A Good Dish, continue buying and using handmade pottery and have a wonderful winter full of new stories, adventures, cooking and eating. Happy New Year!

Split Pea Soup (and the version with added spices)

Split Pea Soup with Barley and Vegetables
bell hooks and Sojourner Truth cup from The Democratic Cup
cup designed by Kristen Kiefer – Image by Roberto Lugo
Split pea soup with boosted flavor
Porcelain cup by Rachel Donner

Lentil Soup

Lentil soup with herbs, spices and vegetables
Wood-fired stoneware mug by Doug Casebeer

Beet Salad Two Ways

Shredded beet salad in oval bowl with shino glaze by Malcolm Davis
Cooked beet salad in oval bowl by Robbie Lobell

Basic Bean Salad

Summer Bean Salad
Porcelain Server by Andrew Martin

Carrot Salad

Shredded carrot salad with cilantro, watermelon radish and toasted pumpkin seeds
Oval bowl by Emily Schroeder Willis

Green Salad Every Day

Early spring salad with bagged greens
Bowl by Adero Willard

Cooking Parsnips

Parsnip and carrot mash
Glazed bowl by Janice Tchalenko

Seed Crackers

Home made seed and oat crackers
Earthenware plate by Holly Walker

Applesauce

Homemade applesauce in a maiolica bowl by Stanley Mace Andersen

Ice Cream Cake

3 layer ice-cream cake
Plate by Cristina Salusti

Share this:

  • Click to email a link to a friend (Opens in new window)
  • Click to share on Facebook (Opens in new window)
  • Click to print (Opens in new window)
  • Click to share on Pinterest (Opens in new window)

Filed Under: dessert, Fruit, Recipes, Salads, Starches, Uncategorized, Vegetables

Home Made Crackers – Give Them A Try!

November 16, 2017

Home made seed and oat crackers
Earthenware plate by Holly Walker

Crackers might not be the kind of food you would think of making yourself but some home made varieties are actually quite easy and delicious. Especially with so many people concerned about gluten and wheat, controlling the content of what you bake has become more of an issue. Many of the commercial gluten free crackers we’ve tried are either pretty tasteless (read cardboard like), completely made of white and refined flours or full of sugar or corn syrup.

Last year, Anna Jones, a wonderful British cook and protégé of Jamie Oliver, published an easy recipe called “Amazing Seeded Crackers” in A Modern Way to Cook that was widely reprinted. I liked it when I tried it – these are delicious, full of seeds, crunchy no-wheat crackers – but I liked even more a revised version in Bon Appetit that cut in half the amount the recipe made so it is more manageable and reduced the amount of fat. It also made the fennel seeds in the original optional and suggested substitutions of chopped rosemary and black pepper or dried tart cherries and orange zest. All sound good to me although I like my version with 1 teaspoon of fennel seeds so much that I haven’t tried anything else. Other possible flavor additions could be herbs like thyme and oregano, curry or cumin, caraway seeds, nutritional yeast or cayenne. I substituted flax seeds for poppy (more nutritious and cheaper) and adjusted the amount of seeds a little.

Roll out cracker mixture between two sheets of parchment paper

These crackers are vegan, delicious alone or with many kinds of spreads or cheese and highly addictive! They are not an ordinary texture like a crispbread or wheat thins but everyone I have served them to has loved them. Don’t be intimidated. If you let the ingredients sit long enough to soak up all the liquid in the recipe, roll them out between sheets of parchment paper and don’t let them burn, you really can’t go wrong. It takes only a few minutes to mix up and a few more to roll out. When you finally break them up, each piece will be a different shape and you may be left with lots of little bits (those are the cook’s bonus). The crackers will keep in a covered container for a week or two, if they stick around that long!

Rolled out crackers ready to bake

SEED & OAT CRACKERS (adapted from Anna Jones)

  • 1 cup rolled oats (old fashioned not quick or instant)
  • 3/4 cup raw pumpkin seeds
  • 1/2 cup raw sunflower seeds
  • 1/3 cup sesame seeds, natural or black
  • 2 Tablespoons chia seeds
  • 2 Tablespoons flax seeds
  • 1 teaspoon fennel seeds
  • 1 teaspoon kosher salt
  • 2 Tablespoons vegetable oil (I have used sesame, avocado and coconut with success)
  • 1 Tablespoon maple syrup
  • 3/4 cup water

Preheat oven to 375 F.

Mix together all dry ingredients. Mix together oil, syrup and water and stir into dry ingredients until well mixed. Let sit for 15-20 minutes until all the liquid is absorbed.

After it has rested, place 1/2 the mixture on a piece of parchment paper about the size of your baking sheet. I used half sheet pans but cookie sheets will work fine. Cover the seed mixture (I hesitate to call it a dough) with a second sheet of parchment and roll until thin, about 1/8″ thick. It doesn’t have to be a perfect rectangle but should be contained by the paper. Peel off the top piece of parchment and transfer the bottom piece with the rolled mixture to a baking sheet. Repeat with the rest of seed mixture.

Bake the two pans of crackers for about 15-20 minutes until they are starting to brown around the edges. Remove the pans from the oven and carefully (and quickly) flip the parchment and rolled mixture over and peel off parchment. (I grab the edge of the paper on the long side to flip the big cracker into the pan). Return pans to the oven and cook for 10-15 minutes longer until the top is turning golden brown but watch that they don’t overcook. Remove the pans from the oven and let cool completely in the pans. When cool, break each sheet into 8-10 pieces and store in a covered container.

Share this:

  • Click to email a link to a friend (Opens in new window)
  • Click to share on Facebook (Opens in new window)
  • Click to print (Opens in new window)
  • Click to share on Pinterest (Opens in new window)

Filed Under: Hors d'oeuvres, Recipes, Snacks

  • « Previous Page
  • 1
  • …
  • 13
  • 14
  • 15
  • 16
  • 17
  • …
  • 26
  • Next Page »
  • View agooddishblog’s profile on Facebook
  • View agooddisher’s profile on Instagram
  • View a good dish’s profile on Pinterest
Spring Market on Columbus Ave
West 97th St Farmers' Market

Welcome to A Good Dish

Here you will find recipes and ideas for easy to make and tasty meals, sources for interesting dinnerware on which to serve those meals and resources for ingredients, classes and food related travel. My goal is to make daily cooking simpler and to inspire you to try different recipes beyond the handful you already make repeatedly. I hope that relaying my experiences will enhance yours. Follow along and let me know about your own cooking and food journeys.

Archives

Subscribe to Blog via Email

Enter your email address to subscribe to this blog and receive notifications of new posts by email.

Copyright © 2025 · Lifestyle Pro Theme On Genesis Framework · WordPress · Log in