• About Me
  • Products
  • Recipes
    • Breakfast
    • Drinks
    • Salads
    • Soups
    • Vegetables
  • Places
    • Restaurants
  • People
    • Potters
  • Books

A Good Dish

making food simpler

Why A Green Monster Might Just Become Your New Favorite Summer Breakfast

July 28, 2022

Green Monster smoothie
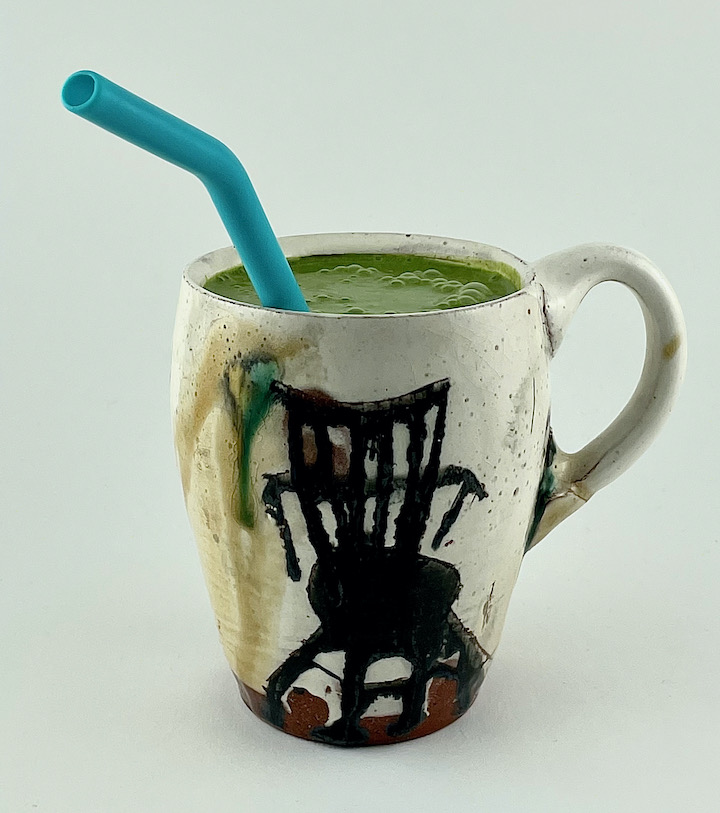
Earthenware mug by Michael Connelly

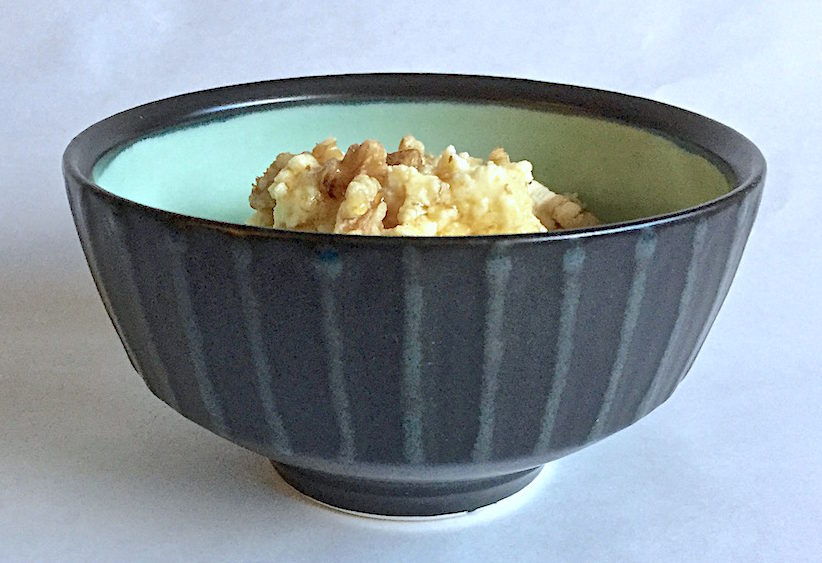
When summer days are hot, as they are now most of the summer, we switch our breakfasts from hearty to the light. Who wants to turn on the stove when it is hot? Not me, for sure. As soon as temperatures hit 80 degrees, steaming bowls of oatmeal with fruit and nuts and leftover rice with poached eggs give way to yogurt with berries, avocado toast and plant milk-based smoothies. 

Leahi Health menu

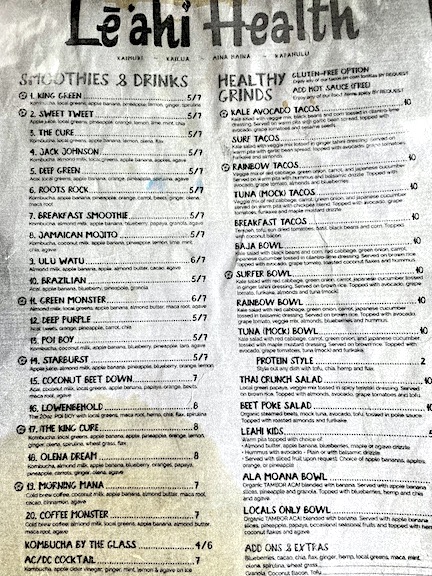
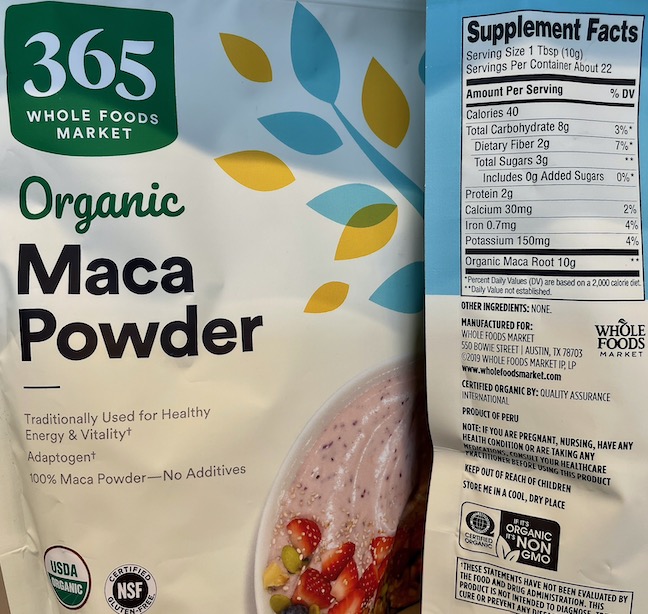
When we had the chance to spend several weeks on Oahu a few years back, one of our best food finds was a local healthy juice bar chain, Leahi Health, that made a terrific smoothie. My favorite was called a Green Monster and my husband loved the Coffee Monster, the same as mine plus a shot of cold brew. They didn’t give recipes but they did list ingredients, from which I estimated amounts. The only new item to me was powdered maca root, a brassica or cruciferous vegetable, which looks a little like a parsnip and is said to help balance hormones (yet to be confirmed). I try to use a frozen banana and chilled plant milk just to keep it all cold, something I crave all summer long, but ice will also do the trick. 

Maca root powder
Moringa is one add-in possibility

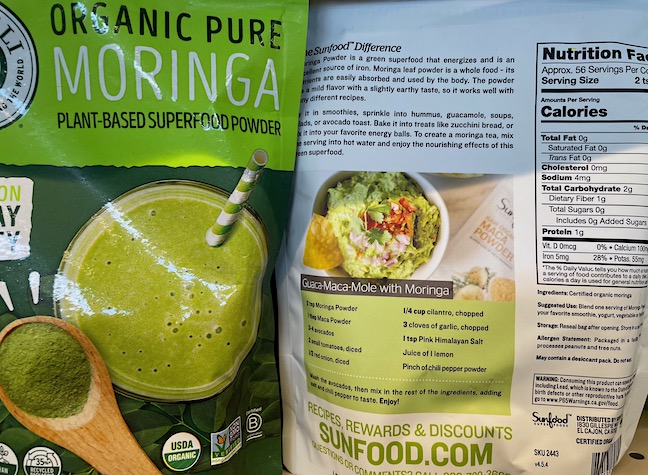
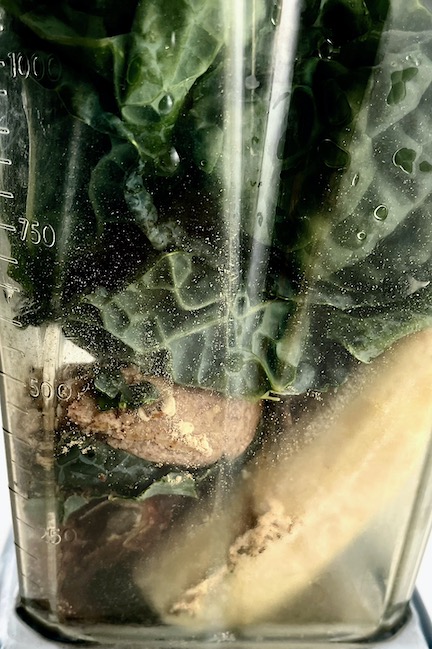
Our basic smoothies are simple, based on the Hawaiian green monster. Half a frozen banana, seeds (hemp, chia, ground flax for omega 3’s), a big handful or two of leafy greens (often bagged or else kale or moringa powder if I don’t have fresh), a couple of pitted dates and either almond, soy or oat milk get frothed together in the blender. Sometimes I add nuts or nut butter for protein and/or a quarter of a whole organic lemon (seeded). I might swap out the nut butter and add berries, frozen peaches, pineapple, açaí, mango or kiwi depending on what I have on hand. If I don’t have any frozen fruit, I might use cold brew coffee, cocoa powder or a combination, along with a banana, seeds, greens and dates. On really hot days, I trade in coconut water for the milk, skip the nut butter and add plenty of grated ginger to the greens and fruit. You can lighten and chill the whole thing by adding a few ice cubes before blending. Every time I make this smoothie, I conjure up palm trees and ocean breezes. Not a bad feeling on a warm summer morning. 

Add greens, etc. and blend until smooth
Verso of Windsor Chair mug
by Michael Connelly

GREEN MONSTER SMOOTHIE 

Blend until smooth:

  • 1 small banana, preferably frozen
  • 2 medjool dates, pitted
  • 1/2 tsp maca root powder 
  • 1 TB ground flax seed
  • 2 generous handfuls washed greens
  • 2-4 TBs almond butter
  • 2 cups cold plant milk
  • 2 ice cubes

Optional add-ins:

  • Hemp seeds
  • Moringa powder
  • Quarter lemon, seeded
  • Chia seeds
  • Espresso or cold brew coffee or coffee nibs

Kittery estuary

Kittery estuary

Share this:

  • Click to email a link to a friend (Opens in new window)
  • Click to share on Facebook (Opens in new window)
  • Click to print (Opens in new window)
  • Click to share on Pinterest (Opens in new window)

Filed Under: Breakfast, Drinks, Restaurants

Love Rye Bread? It Is Easier Than You Might Imagine To Make It Yourself

May 18, 2022

Homemade seeded rye bread
Large blue and white stoneware bowl
by Wendy Goldsmith

I love rye bread, especially for toast and sandwiches. It has a specific flavor quite different from the more common wheat breads that derives not just from the rye flour but mostly from the caraway seeds. It is somewhat sour, somewhat sweet and just mildly salty. It is also one of the easiest yeast breads to make since the texture is dense and not as persnickety as sourdough, challah or sandwich loaves.

Brushing the loaf with lightly beaten egg white
makes the crust darker and glossy

Because it is so simple, the quality of your flour is important so it isn’t stale, rancid or devoid of nutrients. Buy fresh rye and wheat flour from good sources (King Arthur, Arrowhead Mills and Bob’s Red Mill are widely available but you may have a local (or near local mill) you shop) and keep it in your freezer if you don’t use it up quickly. Here is a list of excellent millers. The original of this recipe by Jeanne Heyerly of Chenoa, IL (from a community cookbook called Simply In Season) only called for 1 cup of rye flour in the sponge (the first step in bread making which starts fermentation) and 3 cups of bread flour to be added. Bread flour has higher protein than all-purpose so it forms more gluten, resulting in a better rise and texture. I tried to use equal parts whole rye, whole wheat and white flour to have more rye and more whole grain and it was good but quite dense. If you want to add some whole grain, try one cup of whole wheat and see what you think. The tiny amount of sugar is optional but I think the flavor of rye profits from a bit of sweetness. Honey, maple or date syrup, apple juice concentrate or agave are all usable.

Either grinding your own or buying fresh, good quality
flour makes a big difference to taste and nutrition
The sponge is simply some flour, water,
caraway seeds and yeast mixed to start fermentation

Growing up, I used to go shopping with my mother at a grocery store that had an in-store bakery that made fresh rye bread. The bakery women used to give us (kids) a cookie with sprinkles or a candied cherry when we tagged along but the crusty end of the freshly sliced (in those amazing bread slicers I always feared would take off someone’s fingers) rye bread was my preference. I still choose bread over cookies and rye is one of my favorites, especially for avocado toast, smoked salmon, grilled cheese or a bbq tempeh Reuben. This recipe makes one big loaf or two smaller loaves, one of which you can freeze for up to a few months.

Because it is moist and dense,
this rye bread slices easily

I asked a bread-baking phobic friend to try this recipe and she had encouraging results. She used one cup rye and 2 cups whole wheat in her trial and she found she had to add a little more water in order to knead the dough, which was too dry. Her bread was dense but she likes it that way. I am so happy she is optimistic about continuing to bake bread. Whether you use all white bread flour or some combination of flours, I wish you the same results.

Smoked salmon and smashed avocado
are both delicious on rye bread or toast
Platter by Wendy Goldsmith
This bread makes great toast!
Platter by Wendy Goldsmith

SEEDED RYE BREAD

Sponge:

Mix in a large bowl and let stand 3-5 minutes to proof:

  • 1 cup/250 ml warm water
  • 1 TBs active dry yeast

Add and stir in:

  • 1 cup/250 grams rye flour
  • 1/4 cup/ 60 grams bread flour
  • 1 generous TBs caraway seeds
Cover with a tight lid or plastic wrap and let stand 2 hours (or overnight (in fridge if it is warm out) for “the sponge” to develop more flavor).

Next day, stir down the yeast sponge and add:

  • 3 cups/750 grams bread flour (or a mix of whole wheat bread and all purpose)
  • 3/4 cup room temperature water
  • 2 1/2 tsps salt
  • 1-2 tsps sugar (optional)
 Knead about 5 minutes (if too dry, wet your hands to add a bit more water until kneadable) and then place in a greased bowl, turning to grease all over.

Cover with a damp cloth and let rise until doubled, about one hour.

Punch down and shape into one large loaf (tucking sides under to tighten the ball) or 2 small loaves, letting rise until doubled again.

Brush loaf with a lightly beaten egg white before baking and again 10 minutes before end of baking to promote a shiny crust. You can add more caraway seeds to the top if you like.

You can bake on a rimmed cookie or baking sheet or in a Dutch oven.

Bake in preheated oven (375F) for 35-45 minutes, depending on loaf size. Check for doneness by tapping on the bottom (it should sound hollow) or check temperature for 190F.

Cool on a wire rack for at least 1 hour before slicing.

Note – When I bake bread, I usually measure in grams because it is more precise and baking is an exercise in precision. This recipe is so foolproof, however, that such extreme precision doesn’t seem necessary so I use cup measurements here for ease and because not everyone has a gram scale. I have included both measurements so use whichever you prefer.

Floral honeycomb platter
by Wendy Goldsmith
Wendy Goldsmith’s wonderful ceramics can be purchased on Ohanga.com and this summer at sales and festivals including The Art Drive
The beautifully finished underside of
Wendy Goldsmith’s beehive platter

Share this:

  • Click to email a link to a friend (Opens in new window)
  • Click to share on Facebook (Opens in new window)
  • Click to print (Opens in new window)
  • Click to share on Pinterest (Opens in new window)

Filed Under: bread, Breakfast, Recipes

Bake My Favorite Easy Cornbread and Make People (and Yourself) Happy!

December 28, 2021

Yellow stoneground cornmeal cornbread
Blue and white bowl by Wendy Goldsmith

Cornbread is one of those comfort foods that is simple to make and almost everyone loves. The sunny color is perfect for brightening these short days and long nights! I have tried many versions over the years since I made my first one from a boxed Jiffy mix as a teenager. People have strong feelings about the right way to make cornbread. Some say sweet while others insist on no sweetener. Some use half flour half cornmeal while others are cornmeal-only purists. Finely ground corn flour, as Edna Lewis preferred, vs. coarse corn grits or polenta. Add corn kernels, cheese or green chilies? I think all can be delicious (have you ever had bad cornbread?) as long as the ingredients, particularly the cornmeal, are fresh. 

Stoneground white and yellow cornmeal
from Gray’s Grist Mill

Freshly milled cornmeal can be found across the country. On the east coast there is Maine Grains, Farmer Flour, Anson Mills and Marsh Hen Mill, among many others. Our local place, Gray’s Grist Mill, stone grinds flint corn, both white and yellow, and does mail order. Use white or yellow (or blue or red if you can find it), finely or coarsely ground – just make sure it is fresh. And whatever you don’t use, store in the freezer until you bake again.

Cornbread bakes up especially well
in cast iron pans

I make my cornbread without flour because because, after all, it is corn bread and not cake. If you want it lighter and cake-like, use half cornmeal and half flour. There are endless recipes, many collected in Crescent Dragonwagon’s The CornBread Gospels, in which she lays out Northern vs. Southern cornbread plus the sweet vs. unsweetened debate. Sometimes I add some date or maple sugar and other times I don’t sweeten at all. I like to use whole or buttermilk but any kind of milk, even plant milks, work. (If using buttermilk, substituting a little baking soda for some of the baking powder will prevent sourness).You can even use half milk and half cream, if you want it richer. I can’t bring myself to use lard but people do. I find the butter adds plenty of flavor and crispness. Add oregano, thyme, diced chilis, dried cranberries, cherries or diced apricots, corn kernels or diced cheese if you want to vary the taste. For a really sweet treat, slather the top with honey or maple butter as soon as the hot pan comes out of the oven. Cornbread makes a great gift, either baked by you (and given in a pan or towel meant as part of the gift) or given as a kit, all the dry ingredients in a jar accompanied with a recipe.

White cornmeal cornbread
Oval plate by Wendy Goldsmith
Cornbread slice with butter and honey
Red plate by Wendy Goldsmith

Cornbread keeps a couple of days and can be frozen but it is definitely at its best hot out of the oven. You can serve it plain or topped with butter while still warm. It is a great accompaniment to bean dishes, chilis, stews and salads, makes delicious Thanksgiving stuffing and can stand alone as an easy breakfast when warmed or toasted, perhaps  with a spreadable soft cheese (I am thinking baked farmer, ricotta or cream cheese) and jam. And cornbread makes a great ham or turkey sandwich, spread with mustard, cranberry sauce or pepper jelly and topped with fresh greens. And although you can make cornbread in any baking pan, a cast iron skillet is best for holding heat. You want the pan hot to make the batter sizzle when it comes in contact with the bubbling melted butter to achieve a crunchy crust. Just thinking about it is making my mouth water. 

Yellow cornbread pieces
White and blue bowl by Wendy Goldsmith

CORNBREAD 

Preheat your oven to 400F and place an 9” cast iron skillet in the oven to heat.

Place dry ingredients in a mixing bowl and whisk to combine:

  • 2 1/2 cups stone ground yellow or white cornmeal
  • 1 1/2 tsps baking powder
  • 1 1/2 tsp sea salt
  • 1-2 TBs maple, date or white sugar, optional
  • Beat together in a separate bowl:
  • 2 eggs
  • 2 cups milk or buttermilk (if buttermilk, use 1/2 tsp baking soda and 1 tsp baking powder)

With a potholder, carefully remove the hot skillet from the oven, set in a safe place and add 2-3 TBs butter.

While the butter is melting, whisk the wet ingredients into the dry.

When the butter is starting to brown and bubbling (don’t let it burn and don’t burn yourself)), pour about half of it in the batter, mix in and pour the batter into the hot skillet (it should sizzle) and then place the skillet in your preheated oven.

Bake 25-30 minutes, until starting to brown and coming away from the sides.

Either invert the cornbread to serve crunchy side up or slice into wedges or squares and serve right away. Makes 8 generous wedges.

Blue and white bird bowl (about 12″ wide)
by Wendy Goldsmith
Verso of white and blue bowl
by Wendy Goldsmith

Wendy Goldsmith makes charming, appealing handbuilt pots that are a pleasure to use. Her whimsical, nature-based paintings, primarily of birds but also fish, flowers and trees, with decorative patterning make me smile when I use them. Lightweight with compacted, rounded edges and glossy glazes on a porcelaneous stoneware, they hold up to repeated usage. You can find her on her website and on Instagram.

Red bird plate
by Wendy Goldsmith
Vase detail – Wendy Goldsmith
Photo courtesy of the artist
Bird flask set by Wendy Goldsmith
Photo courtesy of the artist

Share this:

  • Click to email a link to a friend (Opens in new window)
  • Click to share on Facebook (Opens in new window)
  • Click to print (Opens in new window)
  • Click to share on Pinterest (Opens in new window)

Filed Under: bread, Breakfast, Recipes

Spanish Tortilla – Delicious Any Time And You Probably Have The Fixings On Hand!

January 19, 2021

Spanish Tortilla
Porcelain plate by Jen Allen

Spanish tortilla is such an easy and tasty dish, I don’t know why I don’t think of it more often when planning meals. It can be prepared in advance and the recipe can be varied to include alternative ingredients. Because it is served at room temperature, the tortilla can sit out for a few hours without refrigeration, making it a perfect buffet or party food, (although we still don’t need to consider that for many months).

Traditional potato and egg tortilla

A traditional tortilla Espanola (no there are not corn or flour tortillas involved) is a potato frittata or omelet cooked in a very specific way with quite a lot of olive oil. You simmer the potatoes in oil until very soft. Then you drain the oil, add the egg mixture, cook until set, hold your breath and flip and cook some more. A good (ceramic or other non-scratching surface) non-stick pan or well-seasoned cast iron skillet makes the flipping all that much easier because eggs tend to really stick. The traditional with potato is fantastic but variations are easy. Tortilla will last in the fridge for a few days and travels well for a picnic or lunchbox. Every bar we visited in Spain, in the before days of travel, had their own tortilla sitting on or behind the counter at the ready. My brother-in-law, who studied in Spain and remembered his home stay mother’s version fondly, taught himself to make tortillas last year and encouraged me to try. At first, I was appalled at the amount of oil required but much of it remains in the pan. If you get in the habit of making tortillas, you can save the oil to reuse each time and enjoy an intensified flavor. I used Seamus Mullen’s recipe as a starting point and then varied the amounts to suit my taste.

Tortilla variation with mushrooms, dill and greens

Many cultures make some version of eggs with vegetables, starchy or green. Think of French omelets, Italian frittatas, and Persian kuku (like a green herb frittata). Tortilla is the Spanish version and the way you cook it in oil and flip it is what distinguishes it (frittata goes in the oven briefly to finish). Making one is a great way to use up leftover potatoes and vegetables and doesn’t need cheese like the Italian and some French versions. Perhaps try the traditional recipe first and then experiment with your favorite ingredients. A little smoked paprika enlivens the flavor but plain is delicious. My current obsessions are mushrooms, leeks, leafy greens and fresh herbs so my next tortilla will include some or all of these. One time I added some shredded zucchini just to get rid of it! And don’t be afraid of the oil – most of it is left over and some olive oil is supposed to be good for us!

Bottom of porcelain plate by Jen Allen

SPANISH STYLE TORTILLA

  • 2 cups olive oil
  • 3 large waxy potatoes, sliced thinly (about 3 cups)
  • 1 medium onion, sliced thinly (about 1 cup)
  • salt and pepper to taste
  • 6 eggs, beaten

Heat the oil in a medium frying pan. Sloped sides and a non-stick surface are very helpful.

Add onions, potatoes and a sprinkle of salt and cook at a low simmer until the potatoes get quite soft. Drain the potatoes in a strainer, catching the oil in a bowl. Cool oil and reserve to use again. Salt and pepper the potato mixture to taste and then stir into the beaten eggs.

Add 1-2 TBs of oil back to the pan and when heated add the egg mixture to the pan. Stir occasionally until the eggs start to set up and then lower the heat and cook undisturbed until the bottom is cooked through. (Peek under with a spatula to see if browning and set). Remove from heat, cover with a plate (larger than the pan), press on the plate with one hand to keep pan covered and flip. Jiggle the pan to make sure egg is all released onto the plate. If there is any egg left in the pan, use a spatula to remove and place it on the cooked part already on the plate.

Add a little more oil to the pan and slide the egg/potato mixture back into the pan, cooked side visible. Cook until the bottom is also set and then cover and flip once more to make sure the whole thing is set and edges rounded. Remove from heat and slide onto a plate. Let it all sit for a few minutes to finish cooking inside off heat. Slice into wedges and enjoy warm or at room temperature.

Brown stoneware mugs by Jen Allen from her website.
During the pandemic, Jen has also been making beautiful and comfortable masks for sale on her website.

Share this:

  • Click to email a link to a friend (Opens in new window)
  • Click to share on Facebook (Opens in new window)
  • Click to print (Opens in new window)
  • Click to share on Pinterest (Opens in new window)

Filed Under: Breakfast, Hors d'oeuvres, Recipes

Healthier Cheesecake – No, That Is Not Necessarily An Oxymoron

March 1, 2018

Healthier cheesecake with berries and jam
Porcelain plate by Ryan J. Greenheck

We have a minor dessert dilemma in our home. My husband loves cheesecake. Always has. Especially the tall Italian style you used to find on the lower east side of Manhattan or on Arthur Avenue in the Bronx. But he has become a healthier and more abstemious eater and now eschews most sugar and saturated fat so cheesecake no longer fills the bill. Last spring, when his birthday was approaching, I decided it was time to reckon with these conflicting desires. It took me many tries and although it’s far from perfect, I came up with what is essentially a baked ricotta pudding topped with berries, his favorite. It’s not the fabulous layered ice cream cake on a cookie crust I make for my son’s birthday but, believe me, it tastes better than it sounds.

Baked until golden, this can be served in slices or scooped into bowls as a pudding

Because I decided to forgo a crust, I felt a thick pudding (he loves chocolate pudding) might work if I could get the taste right. This recipe is the result – an amalgam of a custard pie and a cheesecake, and good for dessert or breakfast. I used a combination of Greek yogurt and ricotta cheese with maple syrup replacing sugar. The more eggs you use, the thicker, stiffer and richer the “cheesecake” will be. You could use gelatin or agar to firm up the texture instead of eggs but it would be more like pannacotta. Portion it out, bake and serve the pudding in ramekins or short glass jars, in keeping with the current layered breakfast/dessert in a jar trend, or use a single, larger cake pan or soufflé dish and spoon it out family style. If you want to serve it like cheesecake, sprinkle some graham cracker, digestive biscuit or ginger cookie crumbs to cover the bottom of a greased springform pan,pour in the pudding and bake. It holds its shape when sliced if you treat it gently.

Cheesecake pudding with maple syrup and walnuts
Porcelain bowl by Ryan J. Greenheck

Top this baked “cheesecake” any way you like. Choose any topping from berries, with or without a fruit sauce or blop of jam, to maple syrup with toasted walnuts (delicious). Blend in some cocoa powder, melted chocolate and chocolate chips. Or use slices of cooked citrus, caramelized bananas, fresh kiwi slices or pitted, halved fresh or cooked cherries. It’s your dessert, your choice. I liked it plain but my husband preferred it with fruit spread and berries. It isn’t your usual cheesecake but it is pretty good.

Cheesecake “pudding” with maple syrup and walnuts
Porcelain bowl by Ryan J. Greenheck

HEALTHIER CHEESECAKE/CHEESECAKE PUDDING

Preheat oven to 350 F.

Mix just until smooth (I used a blender):

  • 2 cups plain thick Greek yogurt
  • 2 cups ricotta cheese (15oz container)
  • 2 eggs, beaten
  • 1/4 cup maple syrup (less or more to taste)
  • zest and juice of 1 lemon
  • 1 tsp vanilla extract

Pour into an 8 or 9″ cake pan or soufflé dish and bake one hour until firm and just starting to brown. Cool and serve at room temperature or refrigerate and serve chilled.

Top with berries, fruit compote, jam, caramelized bananas, more maple syrup and nuts, chocolate chips and a sprinkle of cocoa powder or whatever pleases you. Untopped, this will last up to 3 days refrigerated and serves 6.

Share this:

  • Click to email a link to a friend (Opens in new window)
  • Click to share on Facebook (Opens in new window)
  • Click to print (Opens in new window)
  • Click to share on Pinterest (Opens in new window)

Filed Under: Breakfast, dessert, Recipes

  • 1
  • 2
  • 3
  • 4
  • Next Page »
  • View agooddishblog’s profile on Facebook
  • View agooddisher’s profile on Instagram
  • View a good dish’s profile on Pinterest
Spring Market on Columbus Ave
West 97th St Farmers' Market

Welcome to A Good Dish

Here you will find recipes and ideas for easy to make and tasty meals, sources for interesting dinnerware on which to serve those meals and resources for ingredients, classes and food related travel. My goal is to make daily cooking simpler and to inspire you to try different recipes beyond the handful you already make repeatedly. I hope that relaying my experiences will enhance yours. Follow along and let me know about your own cooking and food journeys.

Archives

Subscribe to Blog via Email

Enter your email address to subscribe to this blog and receive notifications of new posts by email.

Copyright © 2025 · Lifestyle Pro Theme On Genesis Framework · WordPress · Log in