• About Me
  • Products
  • Recipes
    • Breakfast
    • Drinks
    • Salads
    • Soups
    • Vegetables
  • Places
    • Restaurants
  • People
    • Potters
  • Books

A Good Dish

making food simpler

The Greenest Pesto From A Source You Might Have Otherwise Thrown Away – Fennel Fronds

October 29, 2020

Fennel frond pesto on pasta
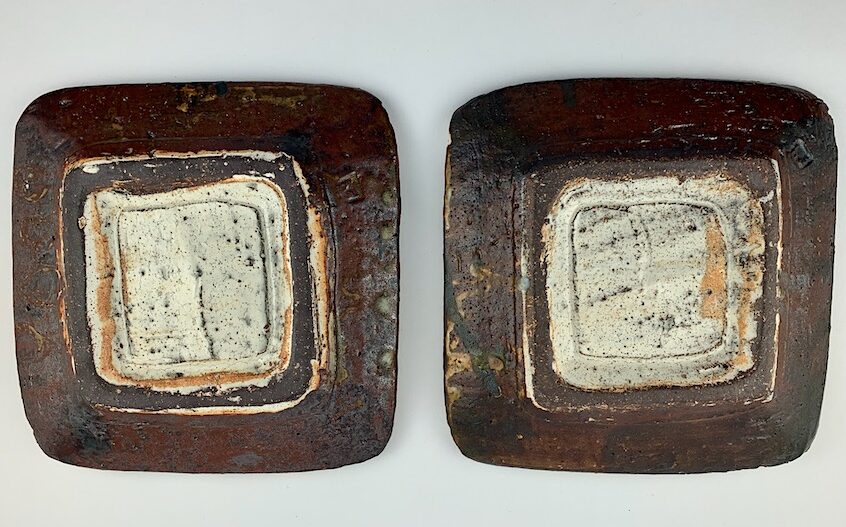
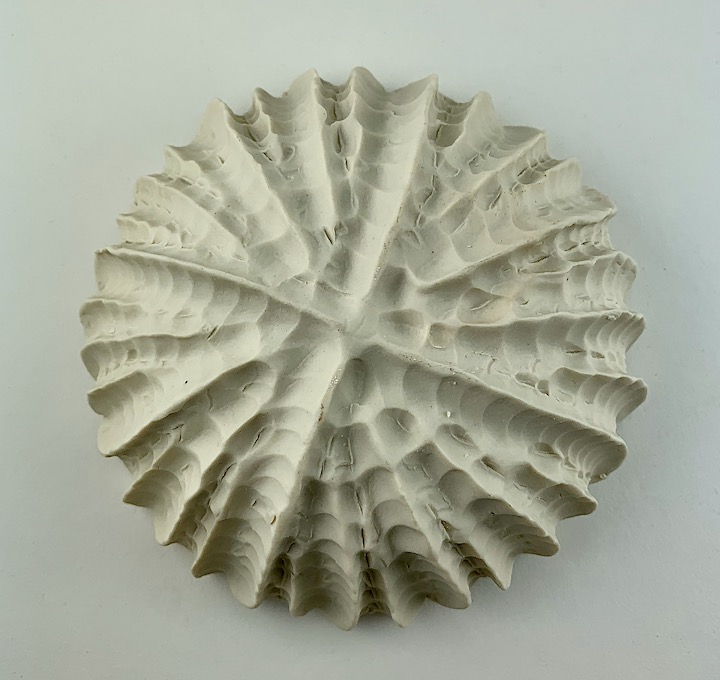
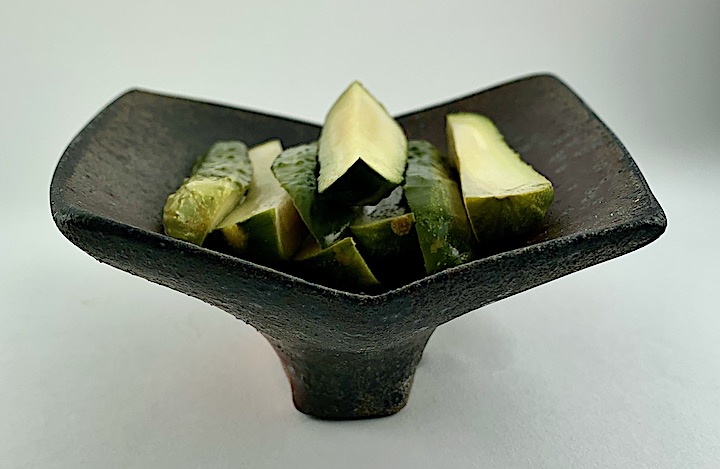
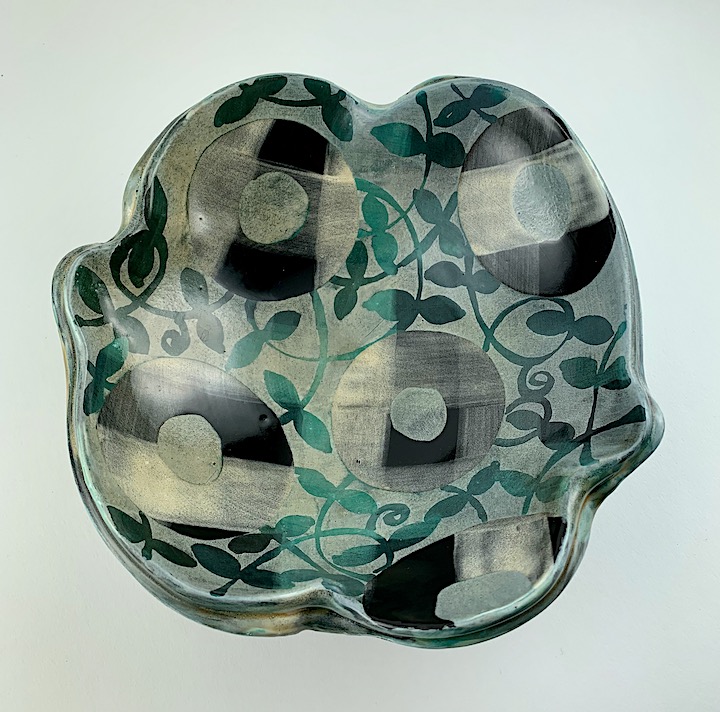
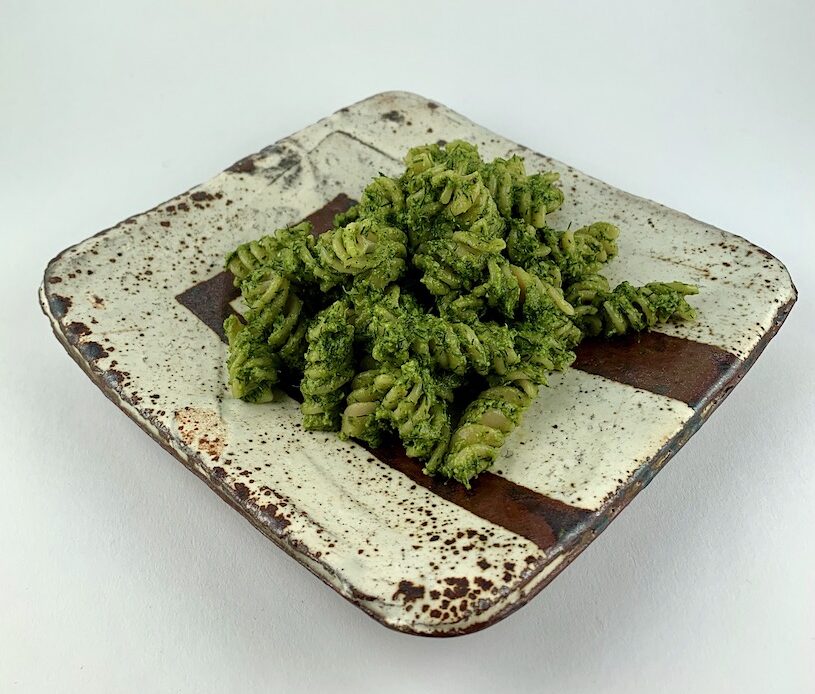
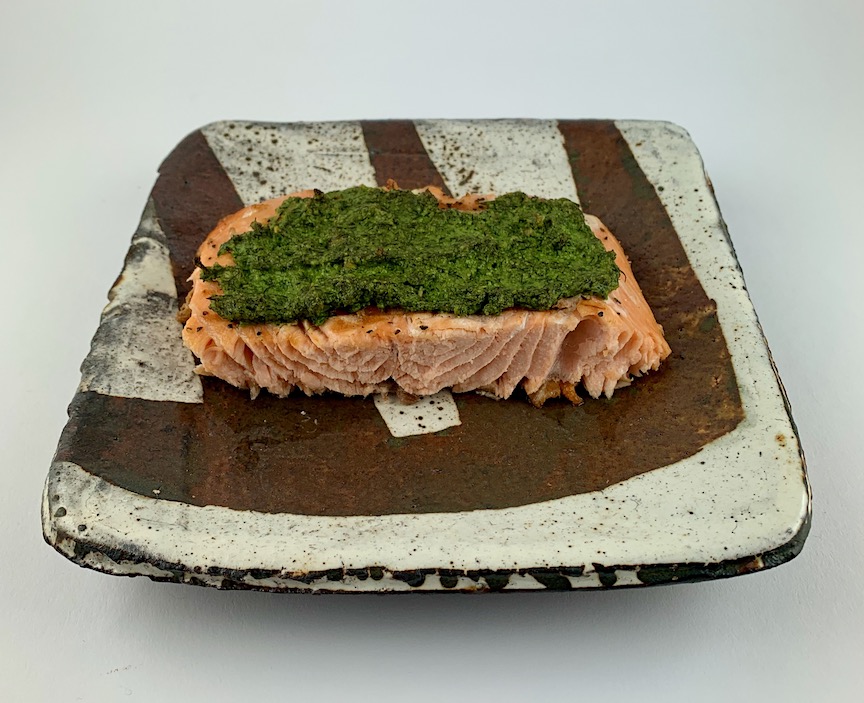
Wood fired slip and iron painted plate by Bandana Pottery

You can make pesto with almost any kind of leafy green or herb from arugula to cilantro to Swiss chard. Although the most common variety is basil, I have tried and liked pesto made with, in descending order, kale, broccoli, garlic scape, parsley and carrot tops. My new favorite – fennel frond –  surprised me. Don’t flinch like I did at first, thinking it would be too licorice-like. It isn’t. I actually thought I wouldn’t like it but I really do! This is a surprisingly tasty pesto and not at all fennel-ly, for those who don’t like that anise flavor.

Fresh fennel from Brix Bounty Farm

Any pesto is an easy recipe. You blend garlic, some kind of nut, salt, greens or herbs and possibly lemon and then add in cheese (or for vegan pesto, miso or nutritional yeast). Then you stream in oil, usually olive, and there you have it. The whole process takes less than 30 minutes. A traditionalist will use a mortar and pestle but a food processor or blender works efficiently. Conventional basil pesto uses pine nuts, walnuts or almonds. Joshua McFadden’s (popular for good reason) kale pesto recipe calls for pistachio nuts. This fennel frond pesto specifies pumpkin seeds. You could certainly make this recipe with walnuts or pistachios if you prefer them. Adding Parmesan or Pecorino creates another layer of flavor but you don’t need cheese; it can be both vegan and delicious with just a few spoonfuls of nutritional yeast instead of Parmesan for that umami flavor.

Trimmed and washed fennel fronds

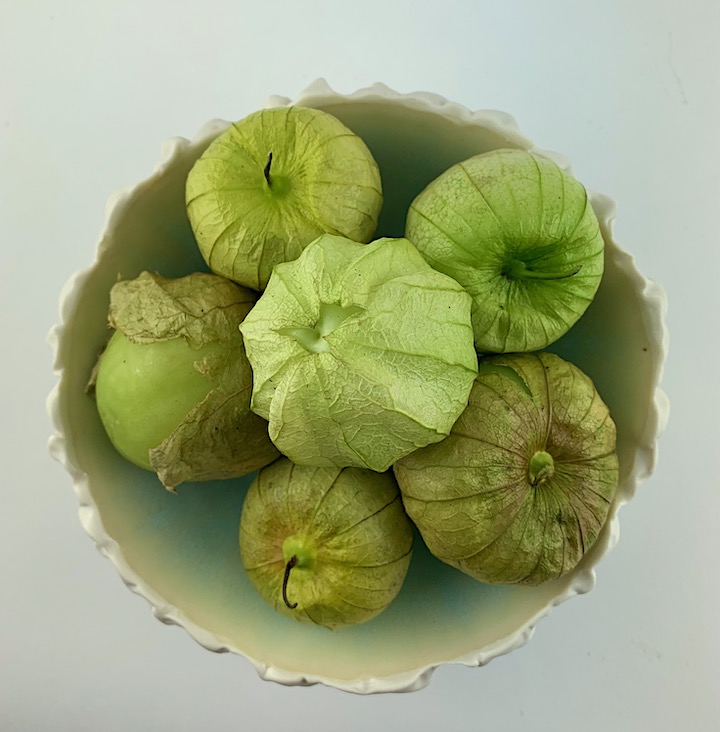
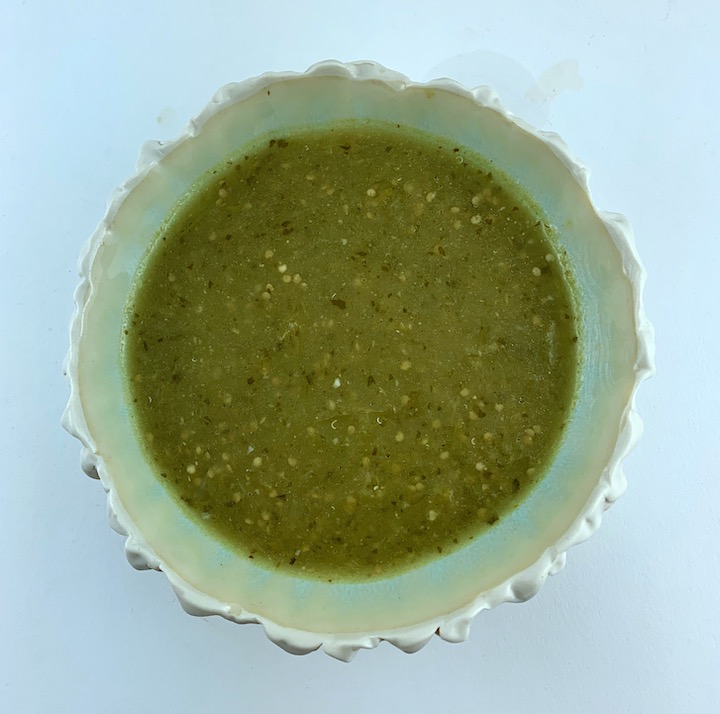
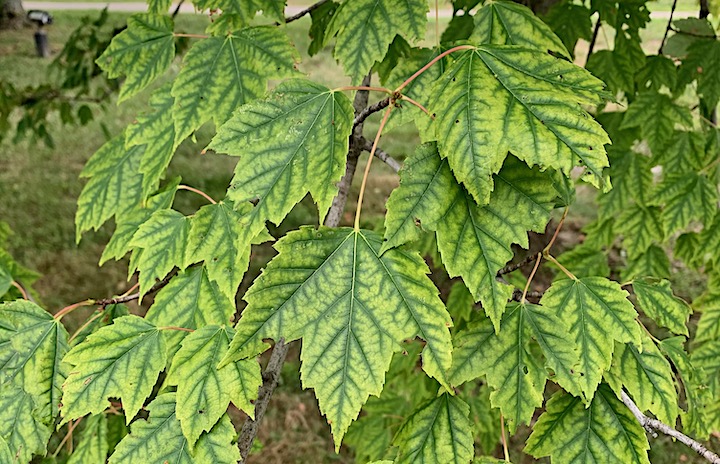
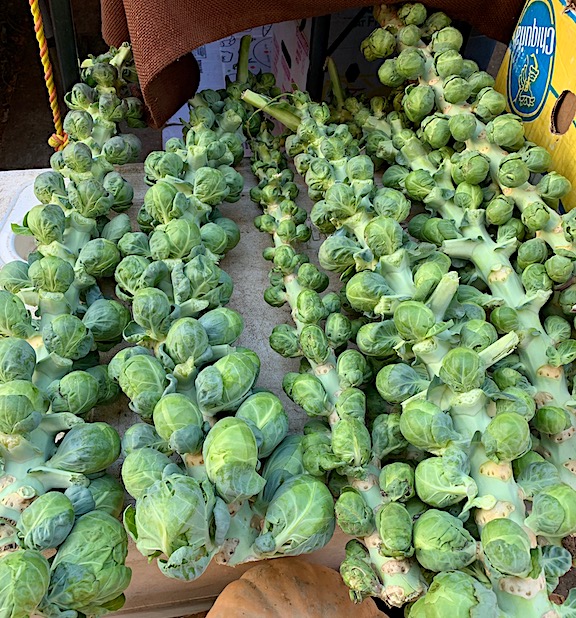
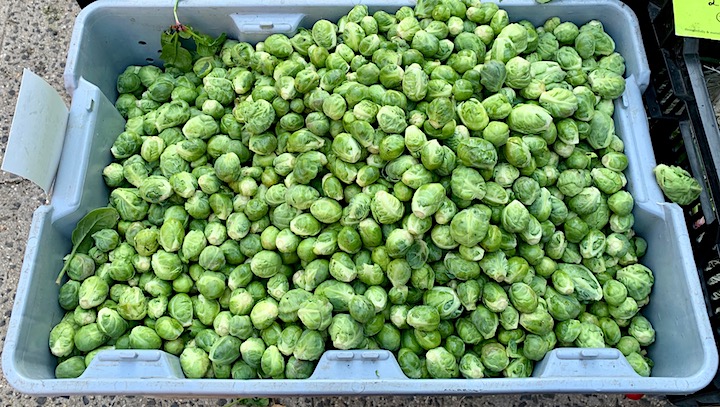
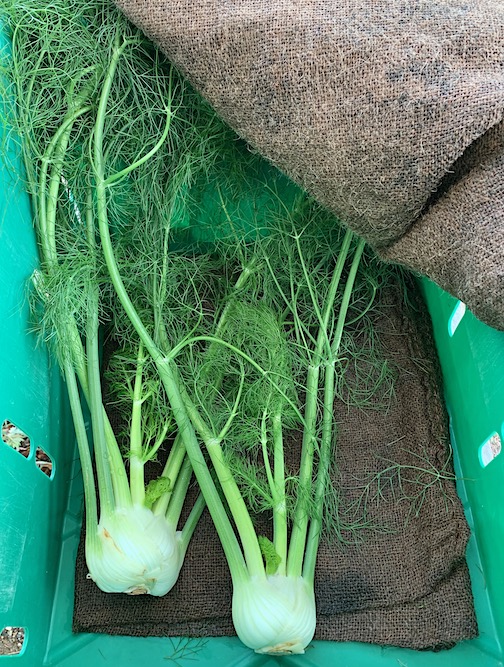
I usually buy fennel to add to a salad or to sauté. The fennel I got last week from a nearby farm was quite frilly and not trimmed the way you find supermarket specimens. There was so much greenery on these two bulbs that I couldn’t bear to throw it away so I did an internet search for what to do with fennel fronds. Surprisingly, among suggestions for adding fronds to soups and salads and flavoring aquavit, there were many recipes for fennel frond pesto. My version below is a combination of several I found. You can substitute some other greens or parsley for some of the fronds if your fennel isn’t as leafy as mine was. Don’t be hesitant – all those fronds along with the lemon make a zesty and very green pesto which would be as good on fish or lamb or tofu as it is on pasta. And did I mention easy?

Fennel frond pesto on grilled salmon
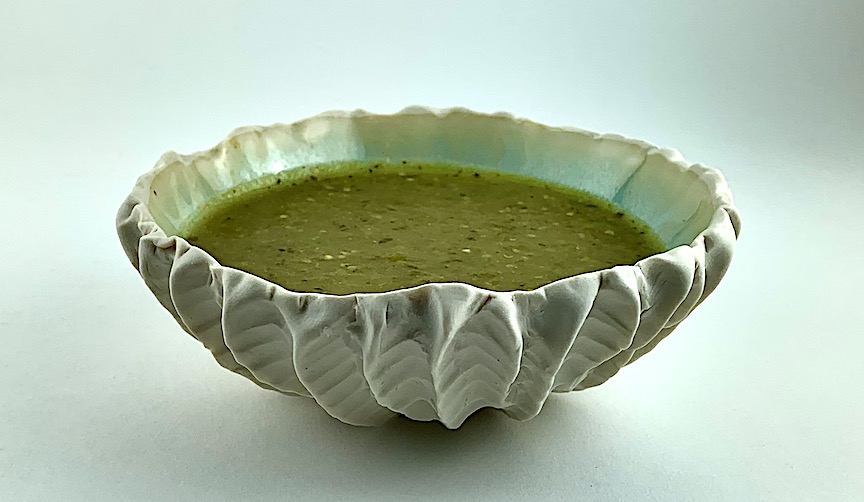
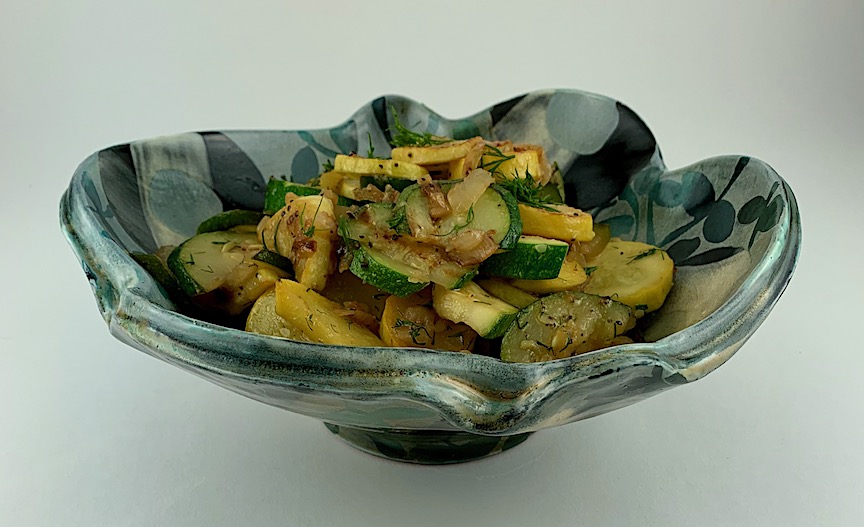
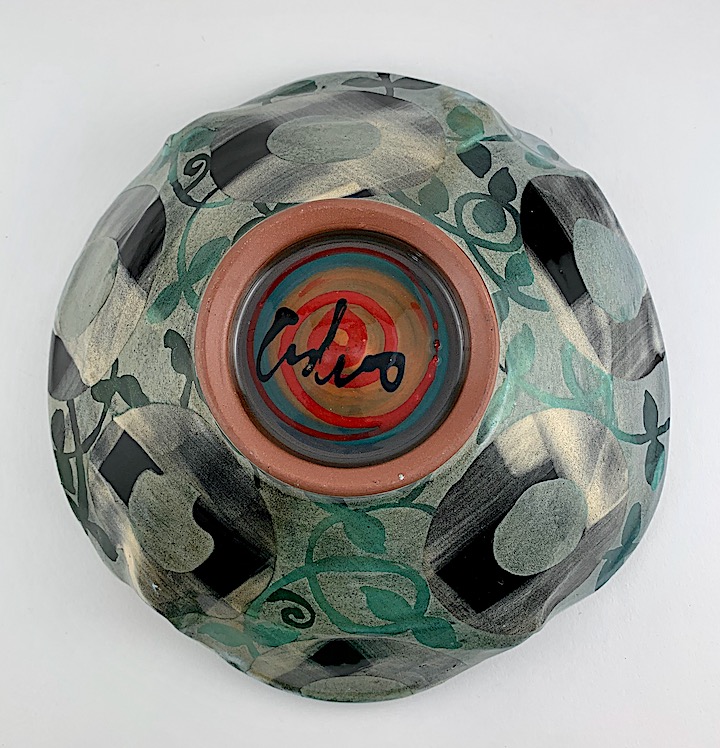
Wood fired plate by Bandana Pottery
Fennel Frond Pesto

FENNEL FROND PESTO

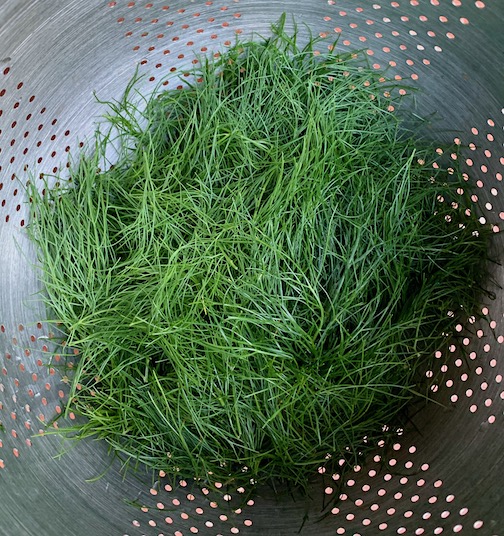
  • 2-3 cups chopped fennel fronds (from 2 bushy fresh bulbs)
  • 2 cloves garlic, minced
  • 1 tsp kosher or sea salt
  • 1 tsp ground black pepper
  • 1/3 cup raw pumpkin seeds (or walnuts)
  • 2-3 TBs fresh lemon juice (juice of 1 lemon) plus the flesh (discard seeds and peel but if you have an organic lemon, you can include the zest/rind for even more lemon flavor)
  • 1/4 cup grated Parmesan or 2 TBs nutritional yeast
  • 1/4 cup olive oil

In a food processor, pulse together garlic, salt, pepper and lemon juice.

Add lemon flesh (and zest, if using), pumpkin seeds, cheese or nutritional yeast and fennel fronds and pulse and process until well blended.

Stream in oil until the pesto is the consistency you like.

Check for salt and pepper.

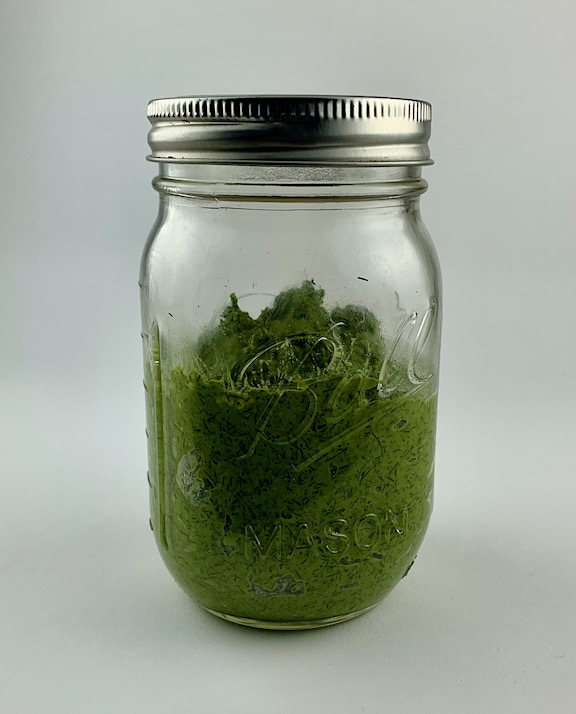
Use immediately or store in refrigerator for up to one week.

Freezes well (with a sealing layer of oil) for a blast of green mid-winter.

*Bandana Pottery (Naomi Dalglish and Michael Hunt) will be participating in Pottery On The Hill, an annual sale which will be online this year Nov. 13-15.

Bottoms of Bandana Pottery plates

Share this:

  • Click to email a link to a friend (Opens in new window)
  • Click to share on Facebook (Opens in new window)
  • Click to print (Opens in new window)
  • Click to share on Pinterest (Opens in new window)

Filed Under: Recipes, sauces and dressings, Vegetables

Get A Big Flavor Boost To Your Summer Meals With An Easy Tomatillo Salsa

August 20, 2020

Tomatillo salsa verde
Porcelain Scallop bowl
by Heather Knight-Element Clay Studio

We’ve belonged to a CSA (Community Supported Agriculture)for over 20 years and every time our farm share included a basket of tomatillos, I had to search for a use for them. One of the best discoveries I made was a delicious mango/tomatillo salsa so good you could forgo the chips and just dive in with a spoon. This summer I found a very different tomatillo recipe, a salsa verde, from Roberto Santibañez, published in The Washington Post cookbook club (free to subscribers), which sounded so good I had to try it. As he promised, it is tangy and zippy and easy to make and can be used to make chilaquiles and enchiladas, for spicing up plain fish, chicken, tofu or shrimp, or just for dipping with chips or crudités. I altered the recipe to include lime and onion for more complexity but otherwise the recipe is his.

Fresh Tomatillos

A salsa verde is any green sauce including those made with herbs (think pesto or chimichurri), avocado or tomatillos. In Italy, it might be predominantly capers and parsley while the Mexican version is mostly made with tomatillos, cilantro and chilis of different heats.

I didn’t grow up eating tomatillos but I’ve really come to love cooking with them. I’m not sure they were even grown in New England in the 70’s and 80’s although you can probably find them at any farmers market these days. Since trying them starting in the 90’s, I think I’ve liked every tomatillo recipe I have tried. You can use tomatillos raw in salads for a sharp acidic tang, but cooking mellows them a bit. Just make sure, after removing the husk, to wash off any tacky coating on the skin to avoid bitterness.

Most tomatillo salsa recipes call for roasting the vegetables but that feels like too much heat in the kitchen during the summer. This recipe specifies a brief simmer and sauté, which seems more doable on a warm summer day. You could even skip the sauté and mix in the oil directly. If you want it less spicy, remove the seeds from the jalapeño. And if you want it sweeter, add some mango or peach when blending. The amount of cilantro is flexible and you could also add parsley for more green. If you don’t have a lime, just leave it out. No scallions in your fridge? Use a quarter of a red or white onion or don’t use any. The great thing about salsa recipes is that they are endlessly adaptable. So try it this way first, decide how you like it and make it your own.

Tomatillo salsa verde
Porcelain bowl by Heather Knight-Element Clay Studio

TOMATILLO SALSA (from Truly Mexican by Roberto Santibañez)

  • 1 lb tomatillos (about 10-12, depending on size), husked and washed
  • 1 jalapeño, stemmed but not seeded (if you want a mild salsa, remove the seeds)
  • 1 large or 2 small garlic cloves, peeled
  • 1 tsp kosher salt
  • 1/2 tsp ground cumin
  • 1/4-1/2 cup fresh cilantro, chopped
  • 1 TB olive oil
  • 1 TB fresh lime juice, plus zest if you like a stronger lime flavor
  • 2 scallions, white and green parts, chopped

Put cleaned whole tomatillos and jalapeño in a saucepan and add water to cover. Bring to a boil and reduce to a simmer, simmering about 15 minutes or until tomatillos lose their bright green color. Turn off heat and drain.

Put cooked tomatillos and jalapeño in a blender or food processor with the garlic, salt and cumin. Blend or pulse until coarsely chopped. Add cilantro and scallions and blend until smooth but you can still see the seeds.

Heat the oil in the now dry sauce pan until shimmering. Pour in the salsa and a quarter cup of water, bring to a simmer and turn off. Stir in lime juice. Let cool and store in a glass jar in the refrigerator for up to 2 weeks or process in a water bath to make shelf stable.


Outside of porcelain scallop bowl
by Heather Knight-Elements Clay Studio
Some kind of maple?

Share this:

  • Click to email a link to a friend (Opens in new window)
  • Click to share on Facebook (Opens in new window)
  • Click to print (Opens in new window)
  • Click to share on Pinterest (Opens in new window)

Filed Under: Recipes, sauces and dressings, Vegetables

Refrigerator Pickles Taste Great And Are Surprisingly Easy To Make

August 6, 2020

Refrigerator Pickles
Folded Tray by Stuart Gair
Soda Fired Stoneware

Homemade refrigerator pickles pack a lot of punch for the small effort it takes to make them. Kirby cucumbers are perfect for pickling right now. When I spotted some at the farmers market last week, I bought 2 quarts and got to work. You will need some clean (either run through the dishwasher or washed with soap, well rinsed and briefly boiled) glass jars with lids, white vinegar, salt, garlic and pickling spices.

Kirby Cucumbers From Happenchance Farm Ready To Jar

Pickles and sauerkraut are having a moment, along with yogurt, kefir, kimchi and other fermented foods since they are high in pre and probiotics. Vinegar pickles are not but they taste good and have all the good qualities of the vegetables you use. Some pickles can be extremely salty but I have limited the salt in this recipe. The amount of salt you use is up to you. If you don’t like or can’t eat vinegar, make a salt brine using a ratio of 1 to 3 kosher salt to water and proceed with the rest of the recipe.

Cukes and Spices
Awaiting Brine

I often see beautiful photos of homemade pickles in matching Ball jars but I just wash out and save glass jars from food or condiments we have eaten. They are good enough because I am not boiling and processing my pickles (too much heat in the kitchen), just refrigerating them. The spices will depend on your preferences. Start with mustard seeds, peppercorns and fresh dill and then see if you want to vary the flavor. Almost any spice seeds can work-coriander, fennel, celery, dill and cumin-plus bay leaves, fresh horseradish, ginger, turmeric, allspice and cloves are all good flavorings. If you don’t like garlic, just leave it out or substitute shallots. If you hate dill, use fresh thyme or another herb. Most pickle recipes call for sugar but I didn’t use any. For a touch of sweet, add a tablespoon to the brining liquid before boiling or, for really sweet (bread & butter style) pickles, add up to a cup of sugar. And you don’t have to stop at cucumbers. If you blanch them, carrots, daikon, sweet and hot peppers, beets and green beans all make delicious pickles. Make certain to pour the brine to the top of the jar to make sure the vegetables are completely covered. Then refrigerate 2-7 days, depending on how cured you want your pickles, and munch away.

Footed Folded Tray by Stuart Gair
Soda Fired Stoneware

REFRIGERATOR PICKLES

  • 8-12 Kirby cucumbers, enough to fill 2 wide mouth 12 oz or quart glass jars with lids
  • 3-4 garlic cloves, peeled and quartered
  • 1 tsp mustard seeds (I used black)
  • 1 tsp peppercorns (I used black)
  • 6-8 sprigs fresh dill
  • 3 cups white vinegar (cider vinegar will work but may discolor cukes)
  • 3 cups water
  • 1 tsp kosher salt

Combine vinegar, water and salt in a small saucepan and bring to a boil. Simmer until salt is dissolved and set aside to cool while preparing vegetables.

Cut washed cucumbers into spears (or slices, if you prefer) and pack pretty tightly upright into clean glass jars.

Push garlic pieces and dill sprigs in between cucumbers.

Sprinkle in 1/2 tsp mustard seeds and 1/2 tsp peppercorns into each jar. I added a few allspice berries to each, as well.

Pour in somewhat cooled pickling liquid to fill jars, making sure cukes are immersed. Close with lids and refrigerate at least 2 and up to 7 days before eating, depending on how pickled you want them. Pickles, when under liquid, should keep in the fridge up to 2 months.

This recipe makes 2 jars of pickles but it could easily be doubled or halved, and you can use any size jars you like.

Jarred Refrigerator Pickles
Soda Fired Stoneware Teapot
by Stuart Gair
Drop Rim Bowl by Stuart Gair
Soda Fired Stoneware

Share this:

  • Click to email a link to a friend (Opens in new window)
  • Click to share on Facebook (Opens in new window)
  • Click to print (Opens in new window)
  • Click to share on Pinterest (Opens in new window)

Filed Under: Recipes, Vegetables

What To Do With All That Zucchini And Summer Squash? – Just Caramelize With Onions And Add Fresh Dill

July 17, 2020

Sautéed dilled squash
Earthenware bowl by Adero Willard

From the beginning of summer all the way into September, there is just too much zucchini and summer squash around. We get it in our CSA farm share but I see it overflowing bins at the farmer’s markets and in people’s gardens. What to do with all that squash? You can’t just eat it out of hand like a cucumber or green bean. You can bake it into loaves of bread or into pancakes or muffins but those projects almost always include sugar. I tried making them into noodles but not only did I cut myself badly in the process but I also didn’t enjoy the outcome. Occasionally I grate some into an omelet or salad but my husband, Brooks, hates it so much that I try not to sneak it on him. My standby for tackling a pile of green and yellow squash is to caramelize it with onions and top it off with a big handful of dill, fresh, if possible. We had it last night for dinner and Brooks actually said he enjoyed it!!

Onions just starting
to caramelize

What savory dish doesn’t taste good with caramelized onions? In this recipe, the taste is masked by the sweetness of the onions, the green of the dill and the brown sugar flavor of the caramelization. The more you caramelize both the onions and the squash, the better the whole dish will taste. My mother used to make this recipe, or something like it, with the mountains of zucchini either from her garden or from the bags of it friends and neighbors would give her. It was so much better than the soggy steamed or pulpy roasted with tomatoes recipes she made in an effort to use it all up. Don’t skimp on the size of your pan; the onions and squash will caramelize best in a large skillet. Try to use smaller, younger squashes rather than the larger, seedier, spongier beasts. Pattypan varieties work as well as the straight neck squash, but make sure to cut them in even, not too thick slices. Fresh dill works best but dry is acceptable. Just add the herb at the end of cooking so it stays fresh. And although you want caramelization, please, please don’t overcook the squash to a slushy mess. You can easily double the recipe and use up all your squash. Plus it tastes good leftover which means less cooking in hot weather, always a good thing.

Earthenware bowl interior
by Adero Willard

DILLED SQUASH WITH ONIONS

  • 2 TBs olive, avocado or grape seed oil
  • 1 large onion, (2 would be okay), peeled, halved and sliced
  • 3-4 small to medium zucchini or summer squash, cut in half moon slices
  • Big handful of chopped fresh dill (about 1/2 – 3/4 cup)
  • Salt and pepper to taste

Heat the oil in a large skillet. When hot, add the onions and sauté, stirring occasionally, until they start to brown. Be patient. Add squash slices and stir to combine. Cook, only stirring very occasionally, until squash starts to caramelize. (The more caramelization, the more flavor but don’t let the squash get stewed). Remove from heat; stir in dill and sprinkle generously with salt and pepper.

For a more substantial meal, add freshly grated Parmesan. Refrigerate leftovers and serve the next day at room temperature or briefly warmed. Serves 4-6 as a side dish.

Earthenware bowl exterior
by Adero Willard

Share this:

  • Click to email a link to a friend (Opens in new window)
  • Click to share on Facebook (Opens in new window)
  • Click to print (Opens in new window)
  • Click to share on Pinterest (Opens in new window)

Filed Under: Recipes, Vegetables

Thanksgiving Sides Can Be Both Easy And Delicious: Brussels Sprouts With Chestnuts

November 19, 2019

Brussels sprouts with chestnuts
Stoneware bowl by Melissa Weiss

With Thanksgiving just over a week away, we really need to finalize what to serve or bring for the feast. One of my favorites, and one of the easiest holiday side dishes (aside from a simple baked sweet potato or steamed green beans) is Brussels sprouts with roasted chestnuts. It is so easy it really isn’t even a recipe. You won’t need instructions after you’ve made it one time. The most labor-intensive part of the process is roasting the chestnuts and that job can be done a day or two ahead.

Chestnuts scored and ready to roast

Fresh chestnuts are widely available from now through the end of the year. To prepare your washed chestnuts for roasting, score an x through the dark outer shell on the rounded side of the nut. There are special knives just for this task but a short, sharp paring knife works fine. Place the scored nuts on a rimmed baking sheet and bake for 15 minutes in a 350, until your cut x has curled back to expose some inner flesh. After removing from the oven (I actually did ours in the toaster oven since we still have no gas), wrap the hot chestnuts in a dish towel and crunch them with your hands a bit to loosen the skins. Let them steam like that for about 5 minutes and then peel – a somewhat time-consuming job but one that can be done while watching TV or talking on the phone. You can use the chestnuts immediately or store them in a glass jar in the fridge a few days until ready to use. And if all of this seems like too much work, jarred and bagged roasted and peeled chestnuts are easily purchased.

Brussels sprouts still on the stalk
from Amantai Farm
Fresh Brussels sprouts at our local farmers market from J & A Farm

Similarly, it isn’t hard to clean, steam or roast Brussels sprouts (but frozen are delicious, too). Just trim off the tough bottoms, halve if large, place in a steamer insert in a pot with a lid and add an inch or so of water. Steam 5-6 minutes or until just pierce-able with a fork or knife. Please, please, please be careful not to overcook! Drain and add a generous knob of butter (or earth balance or whatever you use instead of butter), the semi- chopped chestnuts and a generous sprinkle of plain salt, an herb salt like Herbamare or a flavored salt – perhaps truffle?

Brussels sprouts with roasted chestnuts, butter, salt and pepper

I hated Brussels sprouts as a kid, perhaps because they were always served over cooked or because the smell of overcooked cruciferous vegetables is so disgusting. But when I started cooking them for myself and adding butter and salt, I learned to enjoy eating them. The sweet, creamy flavor of the chestnuts is a perfect balance to the vegetal Brussels sprout flavor. This bright green dish, along with a salad and cranberries, will enliven a Thanksgiving table full of predominantly brown, white or pumpkin colored foods. And if it is too much effort to make or get chestnuts, (although I think you’ll find it is worth the time), just cheat and toss in a handful of toasted pumpkin seeds and currants and you’ll have made an otherwise plain vegetable seem quite festive.

Striped bowl by Melissa Weiss
made from wild clay she digs in Arkansas

Share this:

  • Click to email a link to a friend (Opens in new window)
  • Click to share on Facebook (Opens in new window)
  • Click to print (Opens in new window)
  • Click to share on Pinterest (Opens in new window)

Filed Under: Recipes, Vegetables

  • « Previous Page
  • 1
  • 2
  • 3
  • 4
  • 5
  • 6
  • …
  • 13
  • Next Page »
  • View agooddishblog’s profile on Facebook
  • View agooddisher’s profile on Instagram
  • View a good dish’s profile on Pinterest
Spring Market on Columbus Ave
West 97th St Farmers' Market

Welcome to A Good Dish

Here you will find recipes and ideas for easy to make and tasty meals, sources for interesting dinnerware on which to serve those meals and resources for ingredients, classes and food related travel. My goal is to make daily cooking simpler and to inspire you to try different recipes beyond the handful you already make repeatedly. I hope that relaying my experiences will enhance yours. Follow along and let me know about your own cooking and food journeys.

Archives

Subscribe to Blog via Email

Enter your email address to subscribe to this blog and receive notifications of new posts by email.

Copyright © 2025 · Lifestyle Pro Theme On Genesis Framework · WordPress · Log in