• About Me
  • Products
  • Recipes
    • Breakfast
    • Drinks
    • Salads
    • Soups
    • Vegetables
  • Places
    • Restaurants
  • People
    • Potters
  • Books

A Good Dish

making food simpler

Making Your Own Kimchi – It Is Easier Than You Might Think

October 1, 2019

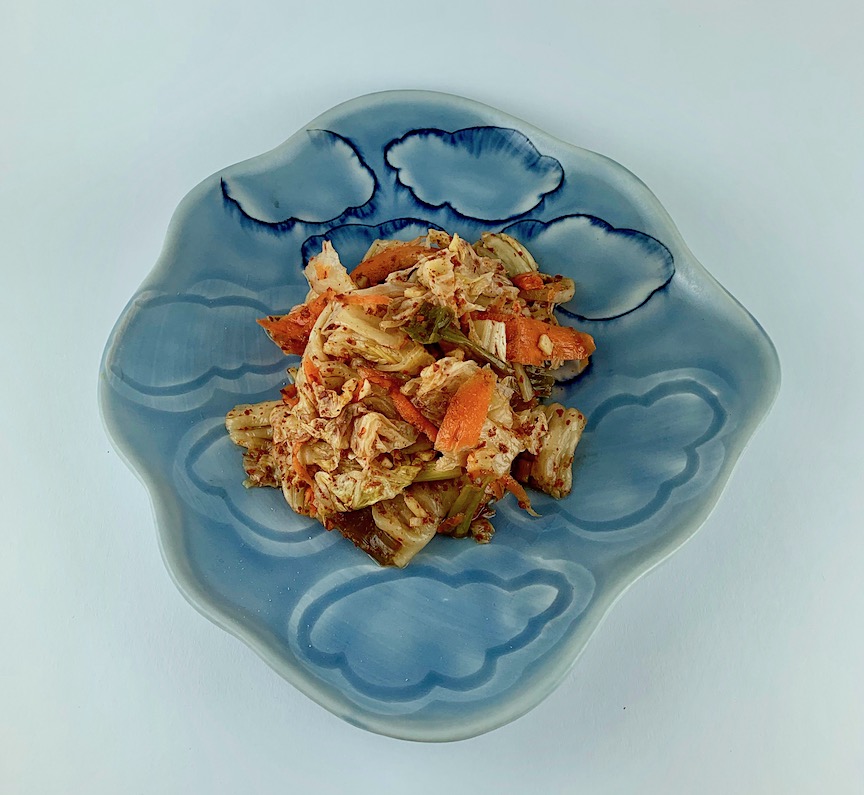
Homemade kimchi
Porcelain cloud plate by Julia Galloway

I didn’t grow up eating Kimchi. I had never even heard of it before I was in grad school and tried some at the new Korean restaurant that had just replaced a local coffee shop. From the smell, I was afraid it would be too strong for my taste and was surprised at how much I liked it. But it wasn’t until the last few years that I began eating kimchi with any regularity after it started appearing in our neighborhood markets. Kimchi, spicy pickled Napa cabbage, is eaten daily in many Korean homes and is becoming more popular in contemporary American cooking. Kimchi in fried rice, added to tacos or quesadillas, blended into deviled eggs or layered on a sandwich are just a few of the ways it is used. Kimchi, like yogurt, has gut-friendly probiotics as well as vitamins, minerals and fiber, the kind of food we need more of in our diets. One day last year, when I had run out of our preferred brand and wanted to top a salmon burger with some (our favorite use), it occurred to me that I should try making it myself.
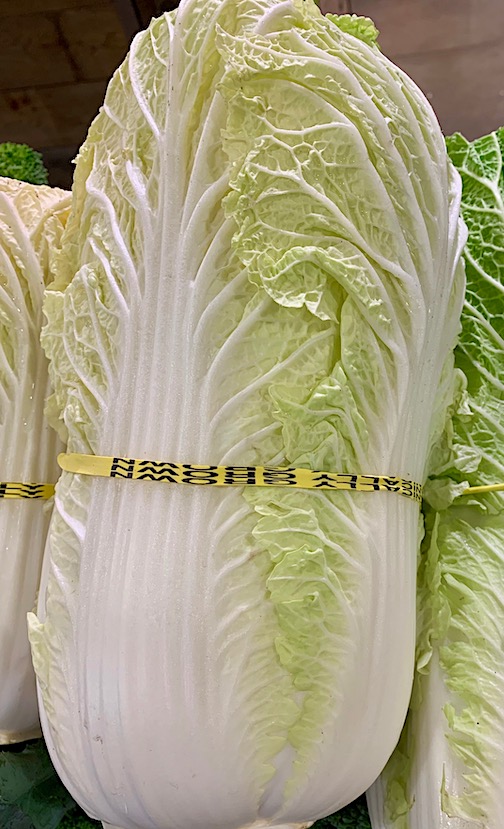
A nice firm head of Napa cabbage

The biggest task in making kimchi at home is gathering the ingredients. The gochugaru, the coarse Korean red pepper flakes, not that obscure anymore, is found in Asian markets or places where globally sourced spices are sold. (In New York, I found it at Kalustyan, Sahadi’s and H Mart and all have online ordering). Napa cabbage, daikon and fresh ginger are widely available these days. Garlic, scallions and carrots round out the ingredient list. Some traditional recipes call for fish sauce, rice flour, fermented baby shrimp, plum paste and sugar, all of which would probably add complexity to the finished product but I wanted a gluten-free, sugar-free, vegan version so I left out all the extras.
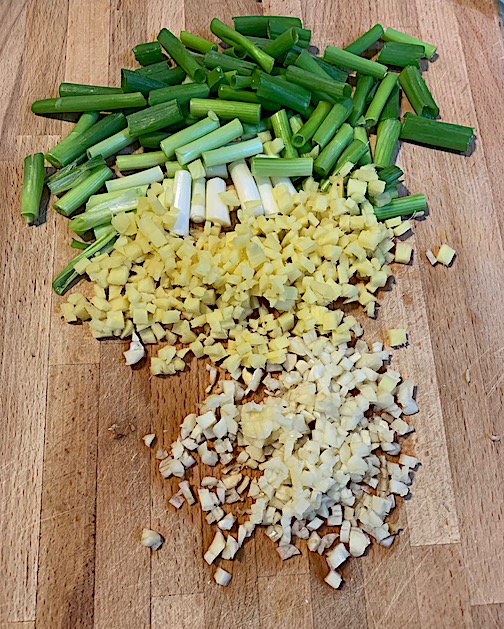
Scallions, ginger and garlic
ready to add to the napa. daikon and carrots

When it comes to pickling of any sort, I refer to Sandor Katz, the guru of all things fermented. My recipe is based on the sugar free kimchi recipe in his book Wild Fermentation. In another book, Basic Fermentation, he offers a version of the same recipe using chili paste instead of flakes (so you have an option if you can’t find gochugaru). Another good source is Marta Vongerichten’s The Kimchi Chronicles  which is a little more traditional but explains and illustrates every aspect of the process in detail. The steps to making kimchi are pretty simple and straightforward, perhaps the most important being keeping everything submerged to ferment, like making sauerkraut, so as not to grow mold. Just remember to wear disposable gloves if you want to avoid staining your hands from the pepper paste and use, of course, clean glass jars.
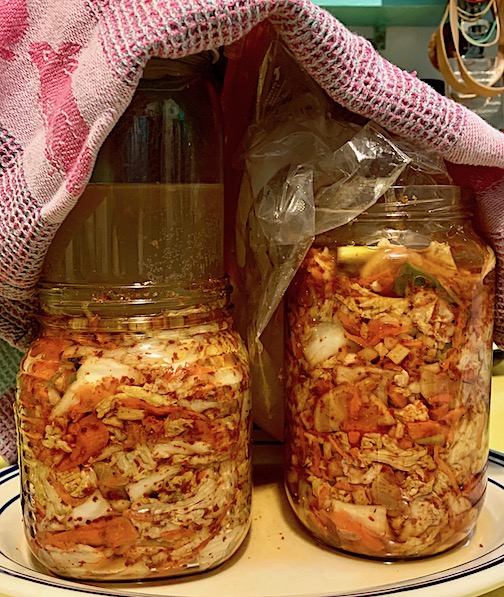
Brine weighting down freshly made kimchi
to keep out air while fermenting

EASY KIMCHI

  • 1 large head Napa cabbage (+/-2lbs), cored and cut into 1-1 1/2“ wide strips
  • 1 medium daikon- peeled and cut into coins or small sticks (julienne)
  • 3 carrots; scrubbed or peeled and cut in strips(julienne)(some people prefer thin slices or grated)
  • 1 bunch scallions, washed and cut in1-2” pieces
  • 3 cloves garlic, minced
  • 1-1 1/2” knob of fresh ginger, peeled and minced or sliced thinly
  • 3 TBs gochugaru
  • 4 TBs salt dissolved in
  • 4-8 cups water- as needed to cover vegetables

Combine the cabbage, daikon and carrots in a large non-reactive bowl (like glass or stainless steel)

Pour the salted water over vegetables and soak for 2-3 hours, stirring occasionally

Drain vegetables and reserve the brine.

Wearing disposable gloves to protect your hands, mix together the garlic, ginger and gochugaru

Add the scallions to the drained vegetables, add the seasoned gochugaru paste and rub it into the vegetables.

Pack the coated mixture into clean glass jars and pack down well to release some brine to cover vegetables. If there isn’t enough liquid, add just enough of the reserved brine to cover them. You can keep the vegetables submerged with a plate and jar filled with water, a freezer bag filled with the leftover brine or some other pickling weights.

Cover with a dish towel and let the jars sit for a day or two to start the fermentation. Like sauerkraut, you can decide when you think it is “cooked”. Remove the weights and store covered in the refrigerator for up to 6 months.

Current work by Julia Galloway is on view at Clay Art Center in Portchester, NY
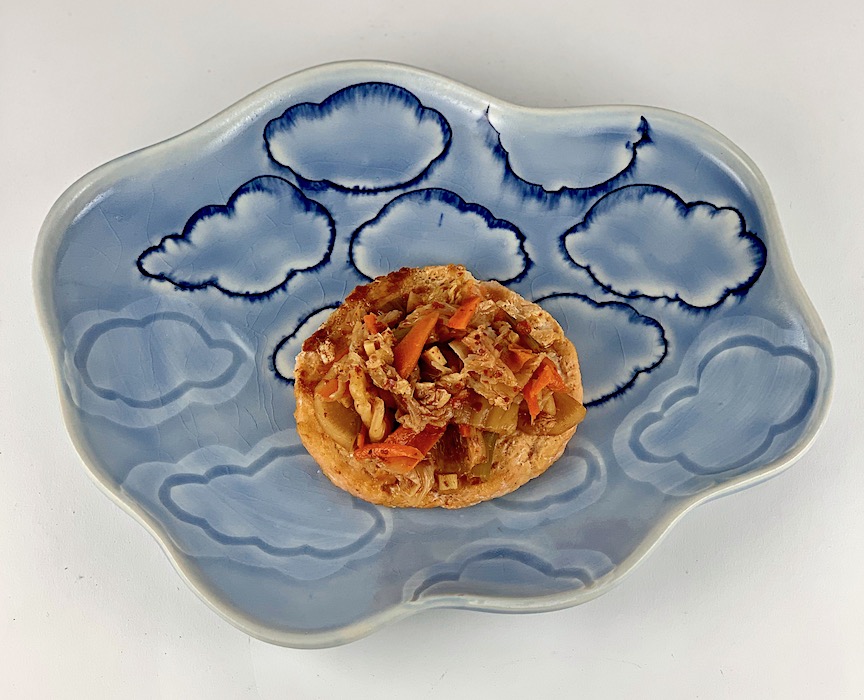
Kimchi atop a salmon burger
Porcelain cloud plate by Julia Galloway   
Share this:

  • Click to email a link to a friend (Opens in new window)
  • Click to share on Facebook (Opens in new window)
  • Click to print (Opens in new window)
  • Click to share on Pinterest (Opens in new window)

Filed Under: Recipes, Vegetables

A Healthy Birthday Celebration and a (Kale)Variation of a Greek Salad

August 15, 2019

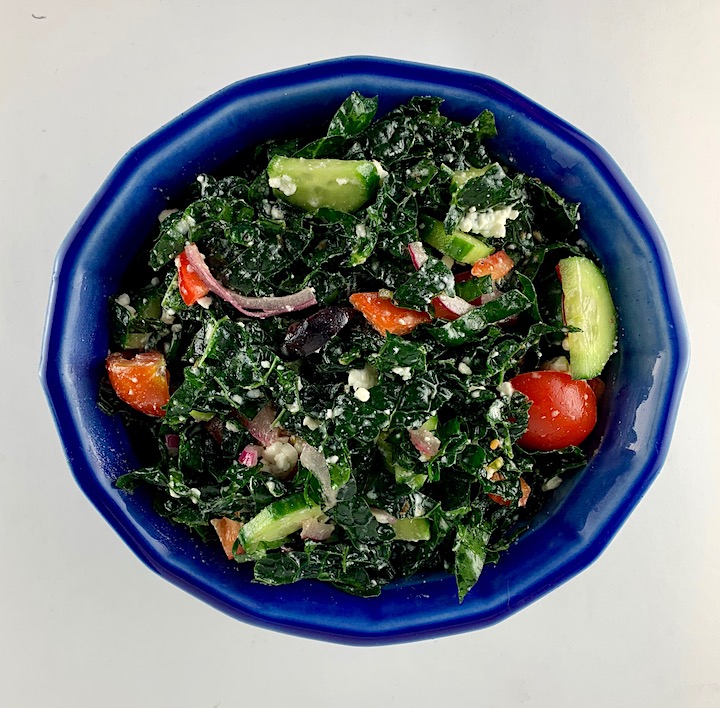
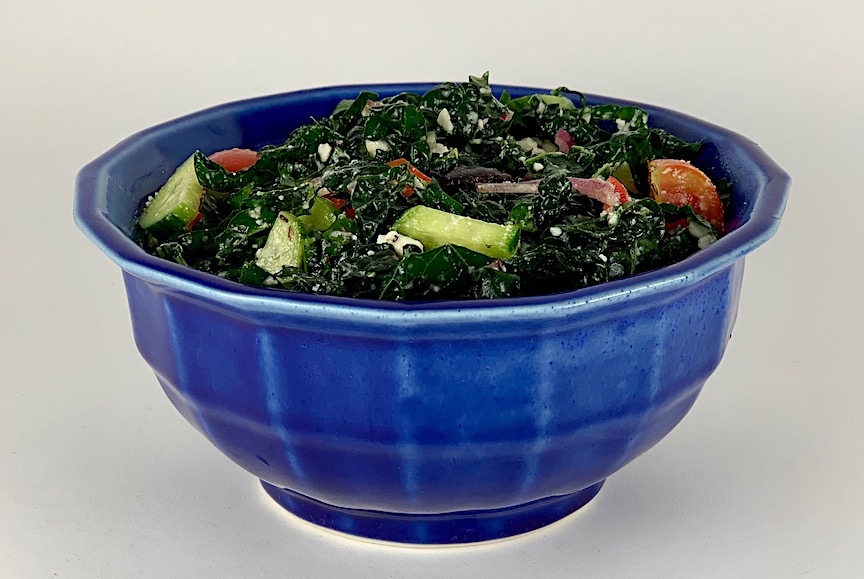
Kale Greek Salad
Porcelain Bowl by Nick Moen at The Bright Angle

My mother had a big birthday this summer and it needed celebrating. We had done both small and large parties in the past and no one, including my mother, was up for that again. A short but special trip seemed like a good solution. I rented a car, picked her up in Connecticut and we drove north to Kripalu, an educational yoga center and retreat in the Berkshires.

View of the Stockbridge bowl and Berkshires over the Kripalu lawn

Kripalu is located in a former monastery and the rooms are nothing to write home about, but  you don’t go to Kripalu for the rooms. You go for the classes, the treatments, the pervasive zen feeling of the place. While we were there, Mom took an introductory yoga class, a fairly wild yoga dance session, attended several informative and relevant lectures, had three different kinds of massage and walked the beautiful grounds which overlook the rolling green hills and the placid waters of the Berkshire Bowl. But I am certain that her favorite part of our time there was spent at the 3 times daily healthy meal buffets!

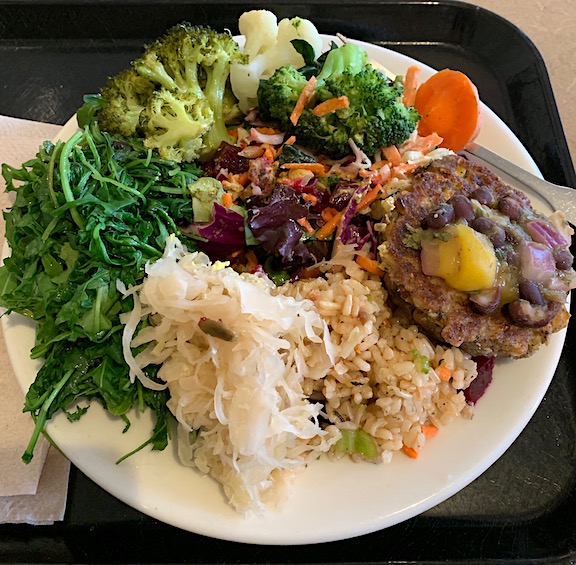
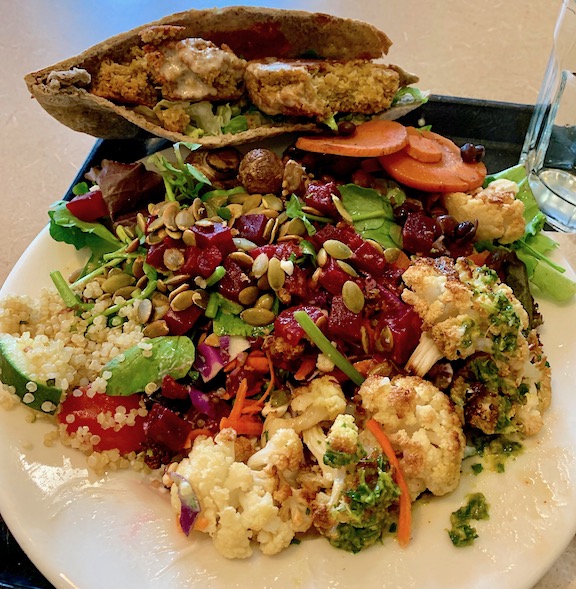
So many veggies on the Kripalu Buffet!

My mother was an early adapter of healthy eating. In the 70’s, she started attending Nathan Pritikin’s longevity programs and we all learned about brown rice, legumes and eating less meat and cheese. So while some people would flinch at the healthy, primarily vegetable, grain and bean offerings at Kripalu, Mom was thrilled. She wanted to taste every dish and some days I think she succeeded. I must admit part of what is so relaxing about the Kripalu buffet is that you don’t have to ever think about what you are going to eat but know there will always be something fresh and tasty. It takes a big piece of stress out of vacationing.

Abundant portion of lunch at Kripalu

One of the best tasting cold dishes I remember from this trip was a greek salad. Fortunately, a version of this recipe with kale was published in the new The Kripalu Kitchen: Nourishing Food for Body and Soul by the current chef, Jeremy Rock Smith. It is especially useful now if you are craving a greek salad but feeling a little squeamish about using Romaine lettuce with all the bacterial scares. I tried arugula when we were out of kale and liked it, too, but the kale offers a more satisfying chew . If you do make it with kale (lacinato or dinosaur only, please), be sure to massage it with the dressing to help break down the vegetal fibers and to make it both more digestible and palatable. Other additions that could work in this salad are avocado, nuts or seeds, artichoke hearts, sliced celery, shredded carrots, chopped parsley or even leftover pasta. I didn’t have fresh oregano so I used dried and it was fine. And I don’t like to add raw onions to a salad so I marinated them in a tablespoon of wine vinegar which I think improved the whole dish.  And you could serve all of the additions (other than the kale) in separate dishes for people to add in as they please so that everyone gets the salad they want.

The new Kripalu cookbook is full of tasty vegan, vegetarian and flexitarian recipes such as Kitchari (a soothing Ayurvedic rice and bean dish), roasted harissa cauliflower, polenta with mushroom sauce, pan-roasted pollock with chimichurri, pea, leek and potato cakes and the Kripalu house dressing with tahini and tamari. I look forward to trying many but for now, while we still have no oven, I will be making my adaptation of their greek salad over and over this summer and remember our lovely days in the Berkshires. Happy Birthday, Mom and I hope you are out walking soon!

Kale Greek Salad
Porcelain Bowl by Nick Moen at The Bright Angle

Kripalu Kale Greek Salad, adapted from The Kripalu Kitchen

  • 2 TBs fresh lemon juice
  • 1/4 cup extra virgin olive oil
  • Pinch each kosher or sea salt and freshly ground black pepper
  • 1 TBs chopped fresh oregano or 1 tsp dried
  • 6-8 loosely packed cups thinly cut strips (chiffonade) lacinato kale (1 generous bunch, stripped away from center rib)
  • 1 cup sliced or diced cucumber (about 2 Persian or Kirby)
  • 1 cup halved cherry or grape tomatoes
  • 1/2 cup bite sized slices of red bell pepper
  • 1/4 cup very thinly sliced red onion, marinated in 1TBs red wine vinegar
  • 4-6 ozs feta cheese
  • 8-10 kalamata olives, pitted and sliced
  • 1/4 cup raw pine nuts or walnuts (optional)

Whisk together the lemon juice, olive oil, salt, pepper and oregano

Add the kale, coat completely and use your hands to massage the dressing into the kale.

Just before serving, add all the other ingredients and toss.

Serves 4-6

Happy Birthday, Mom!

Share this:

  • Click to email a link to a friend (Opens in new window)
  • Click to share on Facebook (Opens in new window)
  • Click to print (Opens in new window)
  • Click to share on Pinterest (Opens in new window)

Filed Under: cookbooks, Places, Salads

Ceramic Reamers: One Of The Kitchen Tools Contemporary Potters Are Creating

June 13, 2019

Porcelain reamer
by Jen Allen

We have been to many ceramics sales in the past few years and while we have continued to find many beautiful pots, what has surprised me is the growing number of potters making specialty items, such as salt cellars, butter keepers and even citrus reamers. When I was still making pots, it never occurred to me to make a juice reamer. I had seen many lovely Depression glass versions but hadn’t remembered any made of clay. Well, times have changed and creative potters are producing beautiful and useful reamers in many formats. 

Porcelain citrus reamer
by Jen Allen
Porcelain reamer and rest
by Gwendolyn Yoppolo

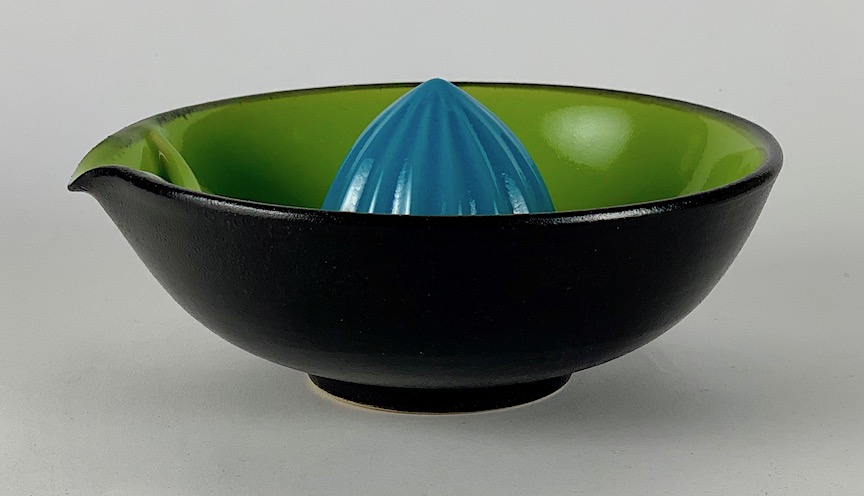
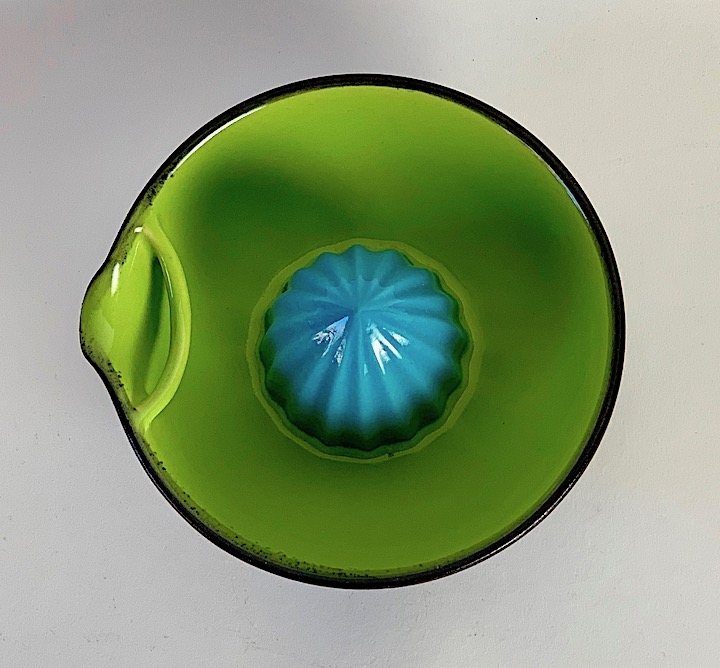
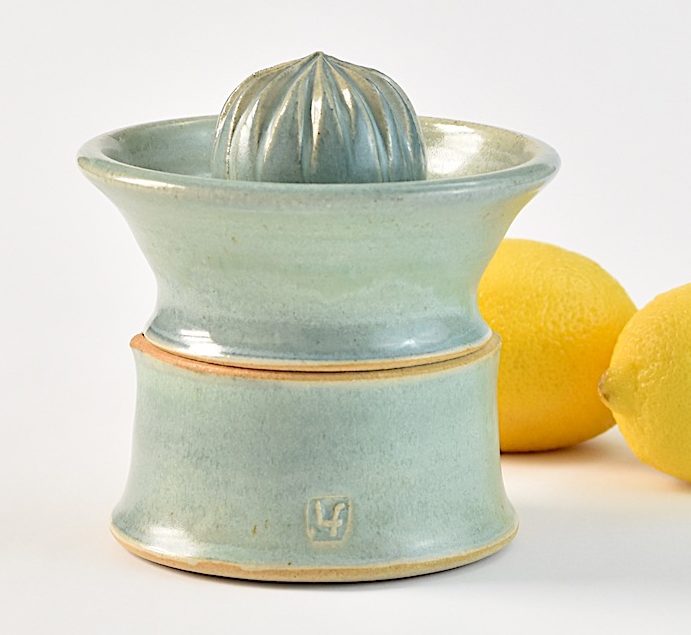
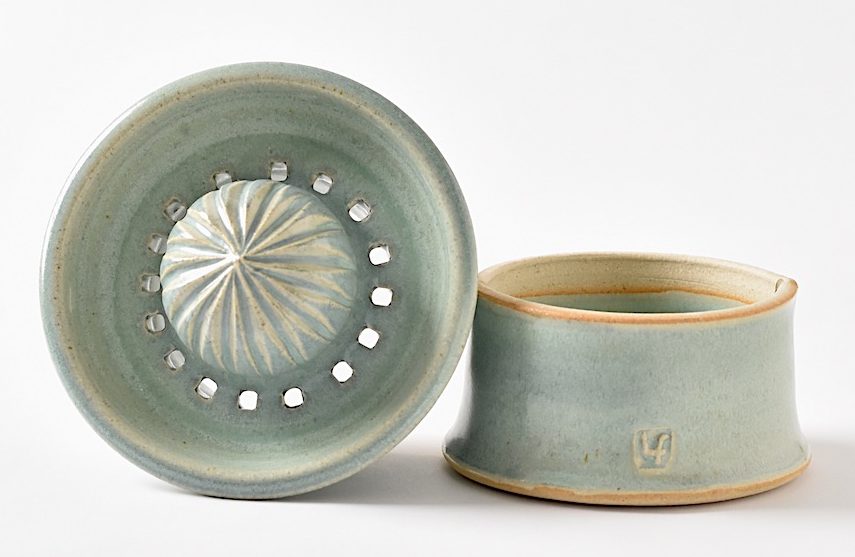
The simplest reamer, like the standard wooden version, is just the juicing head (the part inserted into the cut fruit) attached to a handle. We found a delightful porcelain model with a beautifully ornamented handle by Jen Allen at the Old Church Pottery sale two years ago. It is easy to use,  easy to clean and feels comfortable in my hand. Another, a sleeker but equally comfortable version, with a crystalline glaze by Gwendolyn Yoppolo, rests in its own dedicated holder. Both the forms and surfaces are dazzling, with every detail thoroughly designed and thought through.  A third variety, like the Depression glass originals, sits in the center of a dish which collects the juice and has a pouring spout. I was gifted a brightly colored, well-designed and crafted version by the skillful Swiss potter Peter Fink and it works wonderfully. Berkshire potter Lucy Fagella makes yet a fourth variety of reamer, an elegant two-part thrown composition in which the juice drips through holes in the top half and collects in the bottom. Fagella generously made an instructional video to demonstrate how she makes her simple but well-structured solution. I’m sure there are other beauties waiting for us to discover out there.

Ceramic juicer/reamer
by Peter Fink
Ceramic juicer/reamer
by Peter Fink

Growing up, I used to enjoy squeezing orange juice for breakfast. Even as a kid, it is a good feeling to feel useful around mealtime. But since I don’t really drink fruit juice any more, I use my reamers for juicing mostly lemons and limes, which I use quite frequently in cooking (and an occasional grapefruit or orange, depending on the recipe). It is a useful tool for getting the most juice out of any citrus fruit. I am happy to have found a few useful ceramic versions to beautify my kitchen and heighten my own aesthetic pleasure while cooking. I love handmade culinary tools of all kinds – wooden spoons and cutting boards, cheese knives and spreaders, seed grinding bowls and colanders. They certainly enhance the pleasure of preparing and serving food in the same way a beautifully made cup betters your morning coffee or tea. Thanks to all the creative potters out there who are brightening our kitchens every day!

Stoneware citrus juicer/reamer by Lucy Fagella
Photo by Lucy Fagella
Stoneware citrus juicer/reamer by Lucy Fagella
Photo by Lucy Fagella

Share this:

  • Click to email a link to a friend (Opens in new window)
  • Click to share on Facebook (Opens in new window)
  • Click to print (Opens in new window)
  • Click to share on Pinterest (Opens in new window)

Filed Under: Potters, Products

Ready For A Different Summer Cocktail? Try A White Manhattan

May 30, 2019

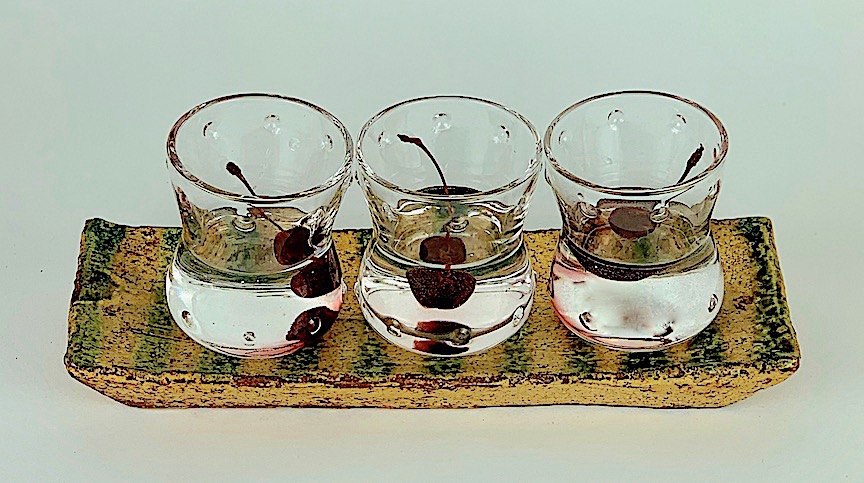
White Manhattans ready to serve
Tray/Plate by Bandana Pottery

I had never heard of a White Manhattan cocktail until we saw one on a restaurant menu. Nor had I even heard of white whiskey. Where had I been? With a little digging, I found it was invented in the early 2000’s by a creative San Francisco based bartender named Neyah White. The white whiskey used in our version, High West Silver, is clear and smooth tasting. It keeps the Manhattan “white”, as does using blanc (sweet white) vermouth. A traditional Manhattan is made with “regular” rye or bourbon, red (or sweet) vermouth and a cherry, generally thought of as a warming or winter drink. A white version just seemed wacky so we had to try it. It was delicious.

White whiskey from High West Distillery

On a tour of the Van Brunt Stillhouse in Red Hook, Brooklyn last spring (a fun outing with a barroom for before or after), we learned that most whiskey is completely clear when distilled and gets its amber tone from months or years of aging in charred wood barrels. High West Silver is an oat-based spirit (85% oats, 15% barley) and, so they joke, aged for about 5 minutes in oak. Some quick research turned up some other clear or “white dog” whiskeys (which seem to be making a comeback after brief fame a decade ago). Hudson, the New York distiller specializing in smooth drinking whiskeys, makes one from corn and Buffalo Trace uses the same mash of corn, rye and malted barley as it does for its aged bourbon but leaves it clear. Death’s Door, a company we knew for its gin. makes a white whiskey that is 80% wheat and 20% barley, “rested” in stainless steel and finished briefly in oak. I can see we have a lot of tasting ahead of us.

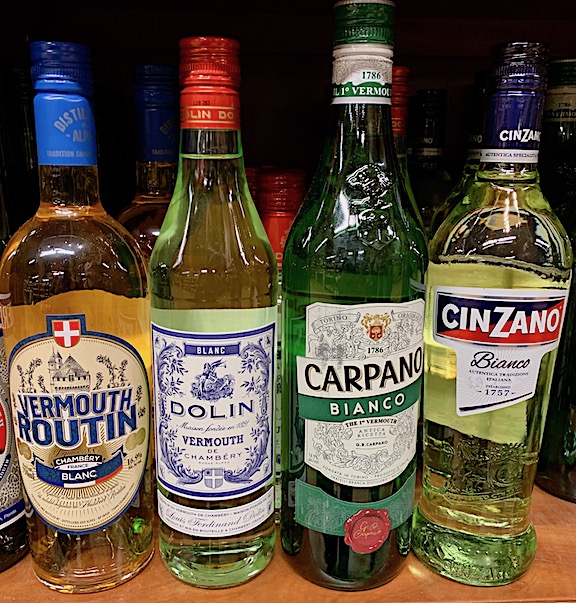
A selection of blanc/bianco vermouth
I chose Dolin to keep the drink clear

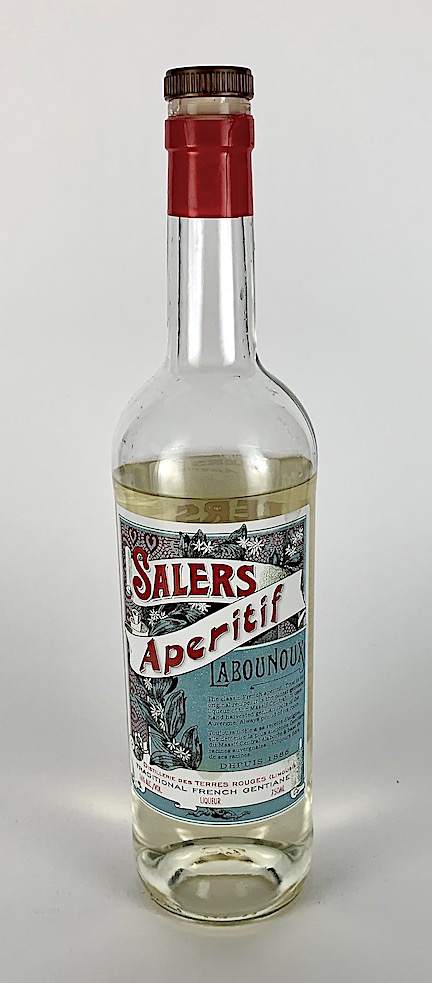
What makes the White Manhattan unique is not just white whiskey. It is also the use of a particular variety of white vermouth – blanc or bianco (the drink we had used Dolin blanc -it is French, after all) with a Benedictine soaked cherry. We tried it first with Little City white vermouth (a small batch, local New York vermouth made with New York State ingredients) and, although it makes a great martini, we found it too dry for a Manhattan. The Dolin blanc works perfectly. To give depth and more complexity, we added Salers, a gentian based French aperitif recommended by a knowledgeable salesperson at Astor Wines. I think Cocchi Americano or Benedictine (which was in the original recipe) would work, too, but would be sweeter. For the garnish, you could soak some dried cherries in Benedictine or use Amarena cherries (I told you about them a few posts ago) straight out of the jar – just rinse first so as not to color the liquor. Or; if you aren’t a cherry person, try an orange or lemon peel. A splash of bitters adds a little more dimension. If you like your drink a bit sweeter, juggle the proportions or use the Benedictine instead of Salers. To make your own White Manhattan, just follow this simple recipe and sip with pleasure.

Salers Aperitif kept the Manhattan pretty clear
and added complexity

WHITE MANHATTAN (with credit to Neyah White)

Shake together in a cocktail mixer over ice:

  • 1 1/2 oz white bourbon
  • 1/2 oz white vermouth
  • 1/2 oz Salers Aperitif or Benedictine
  • A couple of dashes of citrus bitters (I used orange)

Strain into a coupé, martini glass or your favorite ceramic tumbler and add a cocktail cherry, plain or soaked in liquor or a rinsed Amareno cherry or a curl of lemon rind. 

Exuberant peonies
Ceramic vase by Roberta Massuch

Share this:

  • Click to email a link to a friend (Opens in new window)
  • Click to share on Facebook (Opens in new window)
  • Click to print (Opens in new window)
  • Click to share on Pinterest (Opens in new window)

Filed Under: Drinks Tagged With: summer cocktails, White Manhattan

Spring Has Sprung – Try Some Different Varieties Of Greens!!

May 14, 2019

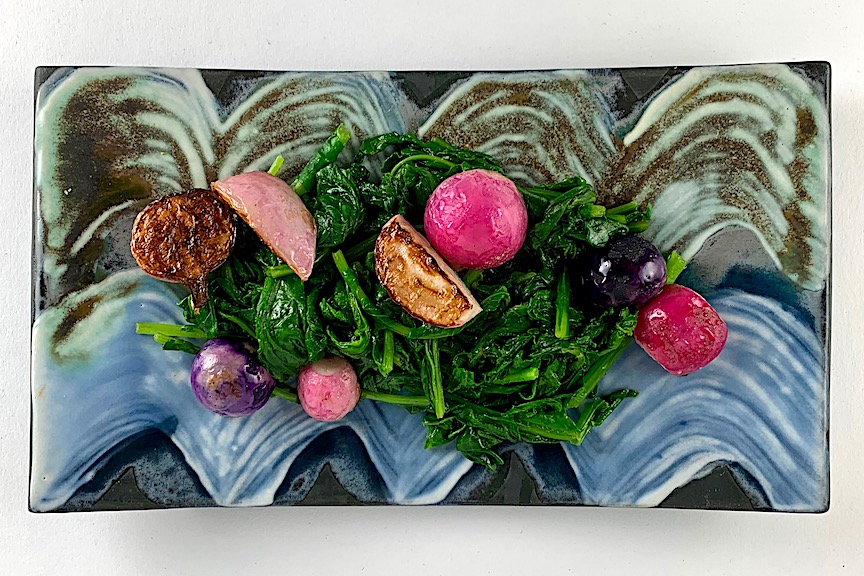
Sautéed radishes and radish greens
Black Porcelain plate by Doug Peltzman

All winter long, we eat a lot of kale and watercress and arugula. I cook these three over and over because they are available and nutritious and because we like them (unlike spinach which I don’t like one bit). But after a winter full of those three greens in rotation, I am ready for some variation. Fortunately, Spring is here and with it the farmers markets are already full of alternative greens.

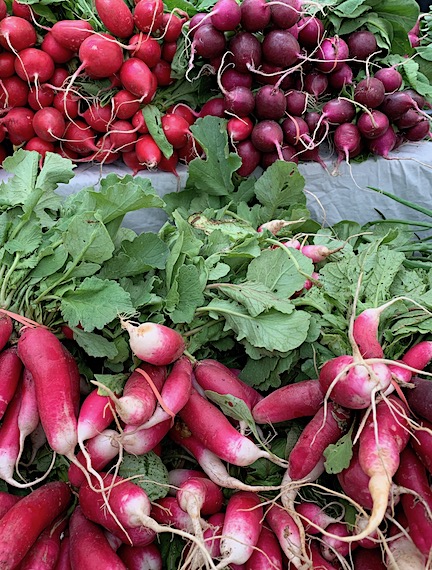
Sheepishly, I admit that I used to throw away the greens atop radishes, assuming they would be too bitter for my taste. Turns out I was wrong all those years! Last week when I saw gorgeous bouquets of red, pink, purple and white radishes at the 97th Street Greenmarket, I finally tried  washing and sautéing the greens as well as the radishes. They were delicious on their own and even more satisfying mixed with some leftover black rice. 

Bunches of pink, violet and French breakfast radishes with greens

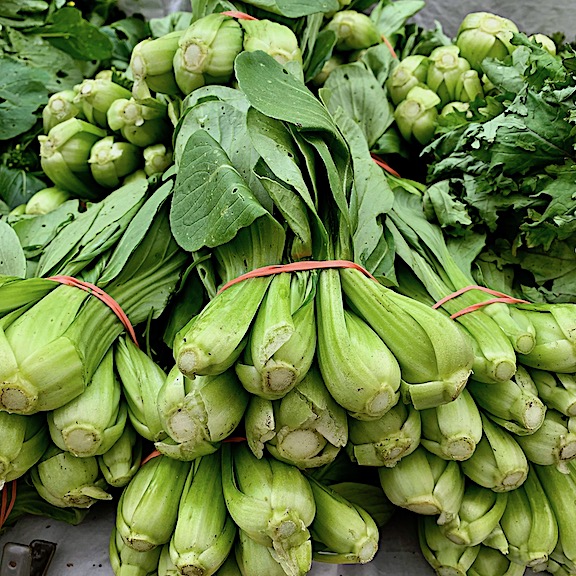
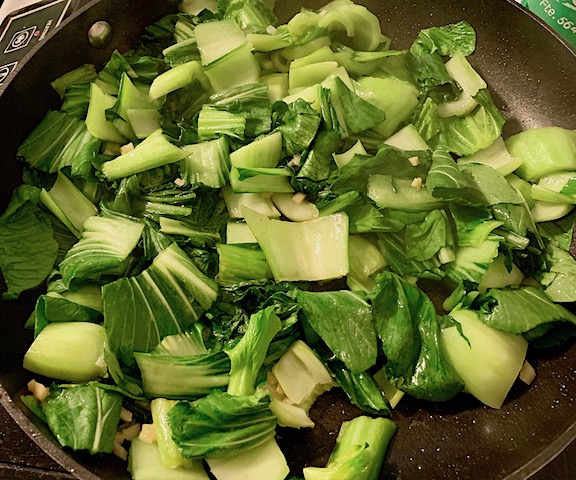
The same farmer, Jeff Bialas, who had the radishes, also had several types of choy – bok choy, pac choy and purple choy. I bought a couple of bunches of the pac choy (more compact and less stem than the bok choy), washed cut and sautéed the greens in a bit of olive oil with some garlic, a pinch of salt and a splash of tamari. 

Bunches of fresh Pac Choy
Sauté of garlic and Pac Choy with a splash of water to help it cook

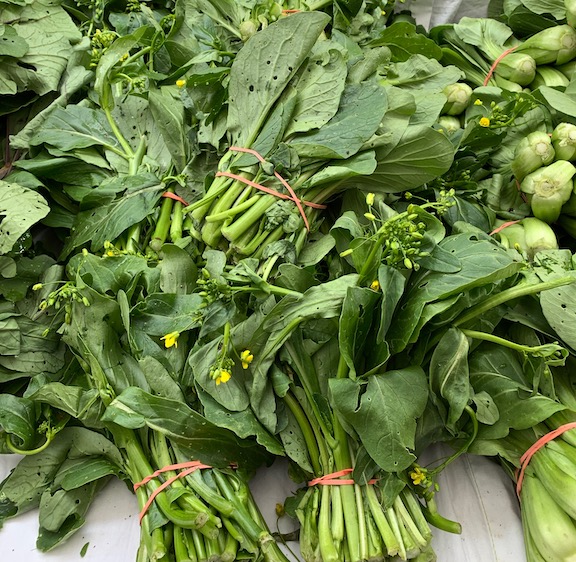
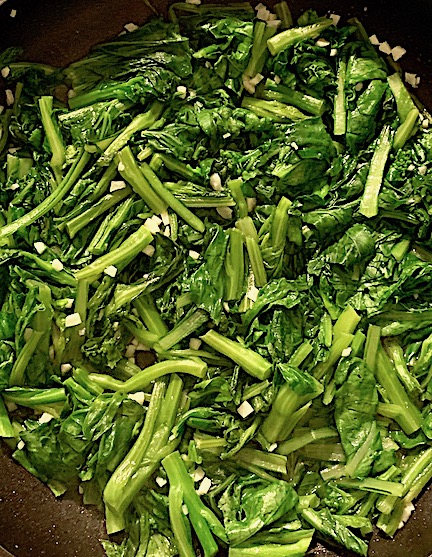
Up at the Thursday Greenmarket at Columbia, the farmer with the stand at the northernmost end, Lani’s Farm, had an incredible variety of Asian greens (many of which I had never heard of before), along with some mustard greens, kales, arugula and lettuces. My favorite was the Yu Choy Sum which I prepared simply by sautéing with garlic, oil and a little salt. It turned out tastier and less greasy than the Chinese delivery variety!

Yu Choy Sum – even the flowers are edible
Sautéed Yu Choy sum with garlic

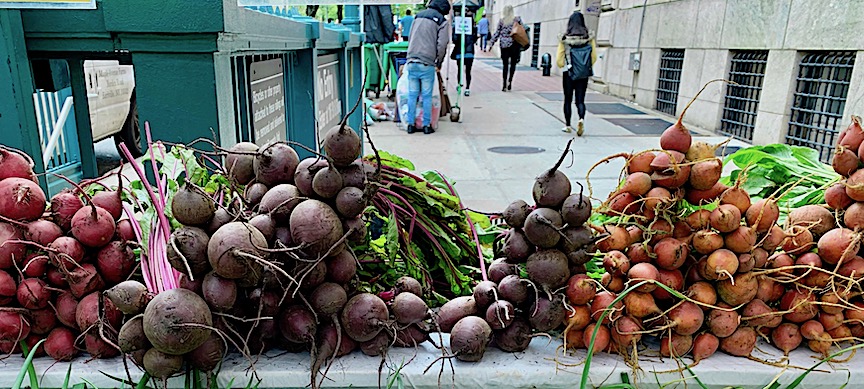
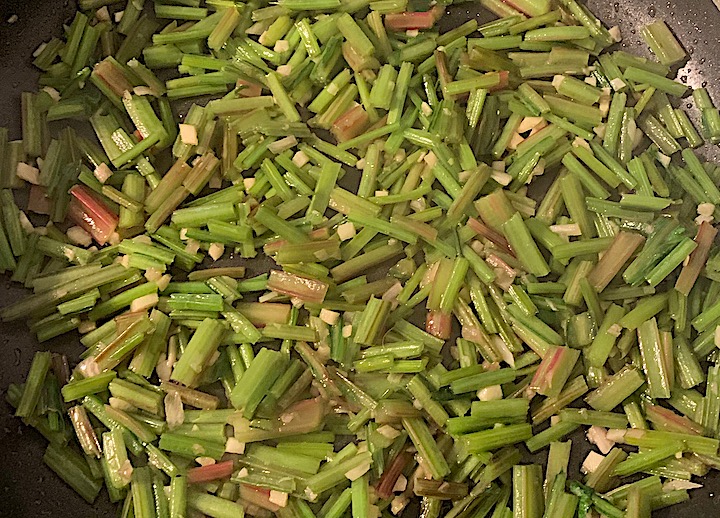
Lani’s also had beautiful bunches of baby beets in the usual red but also golden and chiogga, the candy cane striped variety. The greens looked firm and fresh, unlike  supermarket beet greens which are often quite wilty. I steamed the beets but resisted chucking the greens and instead cut up the stems and sautéed them with a minced shallot and a minced clove of garlic. After about 5 minutes, I added the chopped leafy green tops with a splash of water and cooked, stirring occasionally, until wilted. I added a sprinkle of salt and pepper and a squeeze of fresh lemon juice and voila-the 4th new green of the week. We enjoyed them all and I can’t wait to see what other greens are available next week. Maybe next time I will be brave enough to try the dandelion or turnip greens…..

Chiogga, red and golden beets with greens
Sautéed beet green stems just before adding leafy tops 


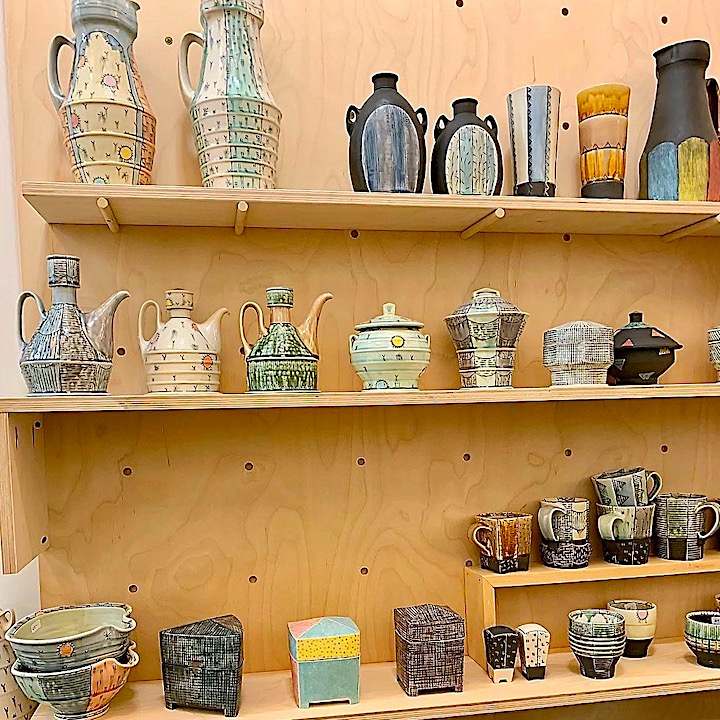
A wall of wonderful pots by Doug Peltzman during the recent Philadelphia Potters Studio Tour

Share this:

  • Click to email a link to a friend (Opens in new window)
  • Click to share on Facebook (Opens in new window)
  • Click to print (Opens in new window)
  • Click to share on Pinterest (Opens in new window)

Filed Under: Farm to table, Vegetables

  • « Previous Page
  • 1
  • …
  • 12
  • 13
  • 14
  • 15
  • 16
  • …
  • 39
  • Next Page »
  • View agooddishblog’s profile on Facebook
  • View agooddisher’s profile on Instagram
  • View a good dish’s profile on Pinterest
Spring Market on Columbus Ave
West 97th St Farmers' Market

Welcome to A Good Dish

Here you will find recipes and ideas for easy to make and tasty meals, sources for interesting dinnerware on which to serve those meals and resources for ingredients, classes and food related travel. My goal is to make daily cooking simpler and to inspire you to try different recipes beyond the handful you already make repeatedly. I hope that relaying my experiences will enhance yours. Follow along and let me know about your own cooking and food journeys.

Archives

Subscribe to Blog via Email

Enter your email address to subscribe to this blog and receive notifications of new posts by email.

Copyright © 2025 · Lifestyle Pro Theme On Genesis Framework · WordPress · Log in